
QuickBooks Integration
With this handy integration, each time your client accepts a Qwilr Page, a new draft invoice automatically appears in your QuickBooks account.
The draft invoice will contain the contents of your Qwilr Quote Block. You can generate an invoice manually anytime, and also have an invoice generate automatically when your client accepts the quote.
Note: To use the QuickBooks integration, you'll need to add both a Quote Block and an Accept Block to your Qwilr Page.
Note: The integration works with all QuickBooks Online account types except Self-Employed.
Setting up the QuickBooks integration
Step 1. In your Qwilr account, head to the top right corner of the dashboard and click on your initials. Then choose Add Integrations.
Step 2. On the integrations page, choose QuickBooks. Then click the Connect to QuickBooks button.

Step 3. Follow the prompts to authorize Qwilr to connect with your QuickBooks account.
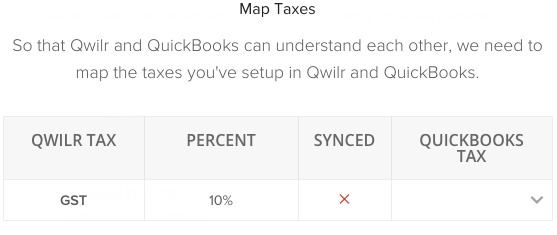
Step 4. To ensure that Qwilr and QuickBooks are using the same taxes, be sure to set up the Map Taxes section. If the taxes aren't mapped, the integration won't work. If you aren't using taxes at all, make sure to remove the default taxes from Qwilr.
Below is the tax mapping display you'll see in Qwilr. When you see an X, the taxes aren't mapped. Use the dropdown menu to select the correct QuickBooks tax.
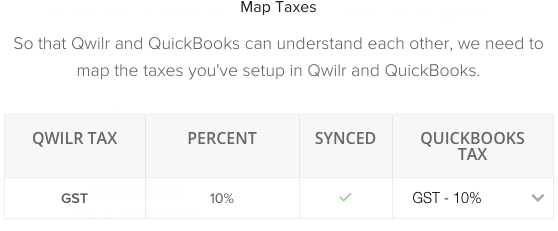
When there is a green check mark, the taxes have been mapped.
Note: QuickBooks requires Canadian companies to have at least one tax entry in Qwilr, mapped to a tax entry in QuickBooks. If you aren't charging taxes, you can create a 0% tax entry in each app.
Your integration between Qwilr and QuickBooks is now enabled!
Automatically creating a draft QuickBooks invoice
When the QuickBooks integration is enabled, a QuickBooks icon appears at the top left corner of all Quote Blocks. When you click on it, you'll be prompted to choose one of your existing QuickBooks contacts from the dropdown menu.
Next enable the Create Invoice on Accept switch. Now when your client accepts this page, a new draft invoice will automatically appear in your QuickBooks account.

Note: This integration requires a Contact record to already be set up in your QuickBooks account.
Manually creating a draft QuickBooks invoice
You can also create an invoice anytime before the page is accepted. Head to the top left corner of the Quote Block and click the QuickBooks icon.
Click the Generate Estimate button. A new draft invoice will generate in QuickBooks. If you want to make sure another copy doesn't generate when your client accepts this quote, you can disable the Create Invoice in Accept switch.

Note: If you're using recurring pricing in your quote, you can choose to have the first installment included in your invoice, or not. See the linked article for more details.
Disabling the QuickBooks integration
You can disable the QuickBooks integration at any time by going into your QuickBooks integration settings in Qwilr and clicking Disable.
