
Adding Identity Verification to a Page
See exactly who's viewed your Page with our Identity Verification!
If you're on our Growth or Scale plans, you can find out who specifically has viewed your Qwilr Pages. You'll be able to add a verification step to any page, and your clients will need to enter their email before they can view it.

In this article:
- Setting up identity and authentication
- What your client sees
- Restricting authentication to a specific email domain
Note: This feature is only available on our Growth and Scale Plans (and legacy Enterprise plan). Learn more on our pricing page.
Setting up identity and authentication
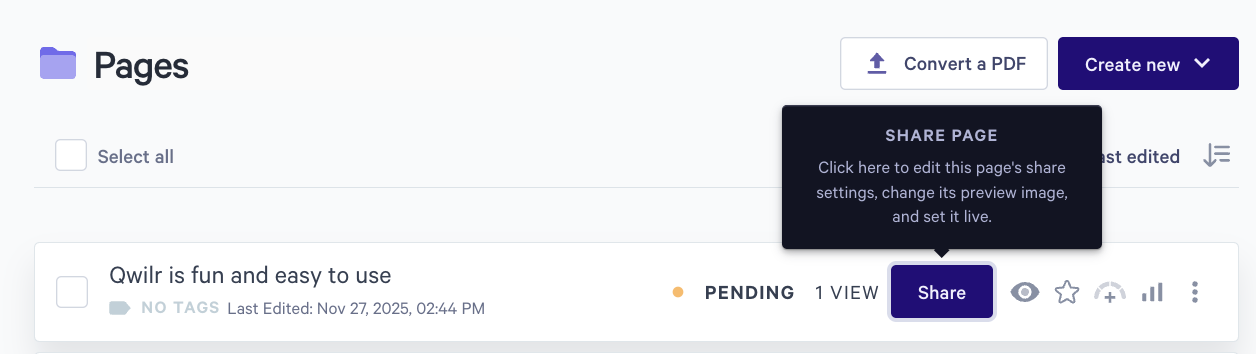
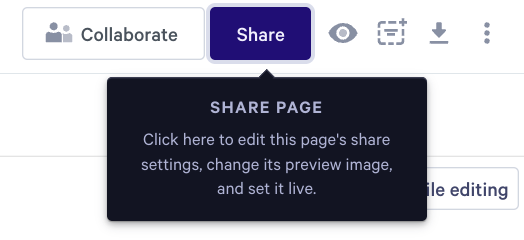
Step 1. Click on the Share button from either the dashboard or the page editor.
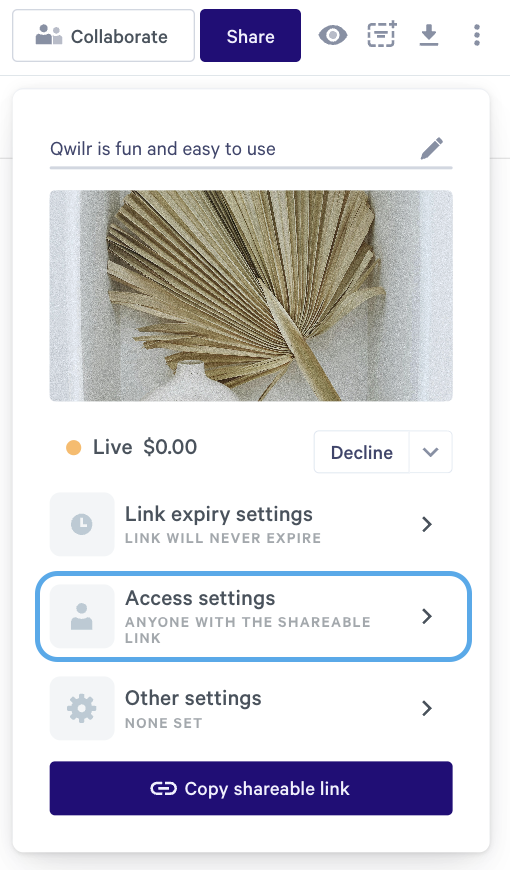
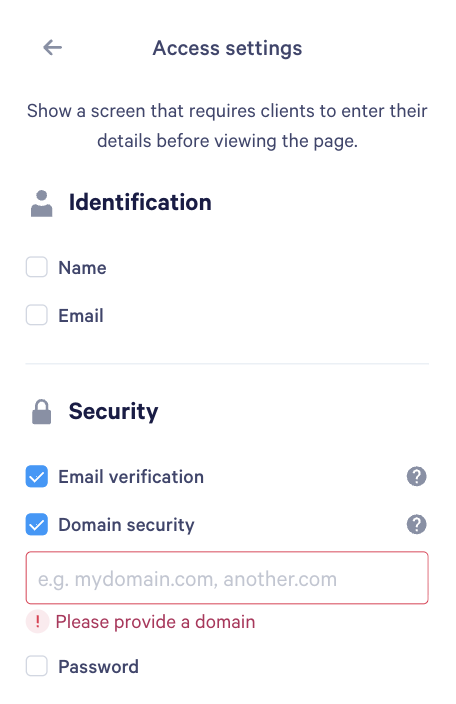
Step 2. Click on Access settings.
Step 3. Click the Email Verification checkbox. This will also allow Domain Security to be selected if you want to limit the access from the domain an email user comes from.
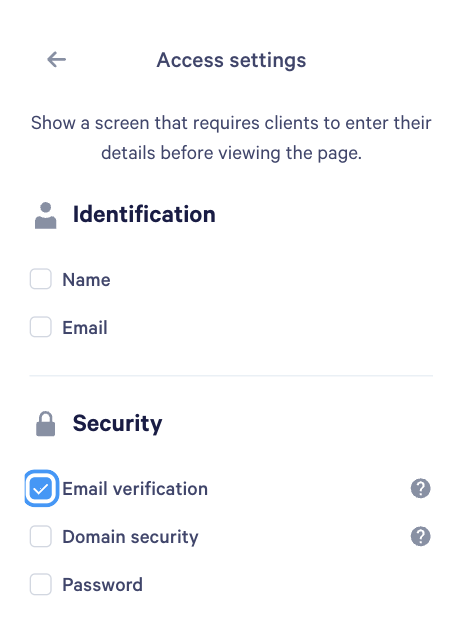
Alternative Step. If you want to simply have them fill out their name or email address for tracking purposes in analytics, without needing them to login to their email to verify, you can check either of the two Identification options of Name and/or Email.
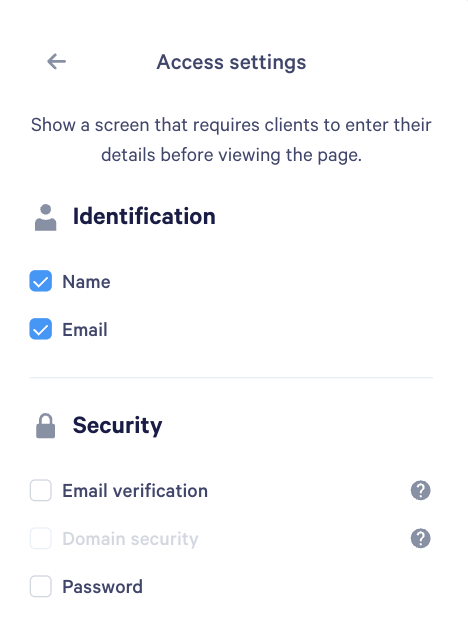
Note: You can also apply this setting to any template, so identity verification is automatically applied to each page your team creates from it.
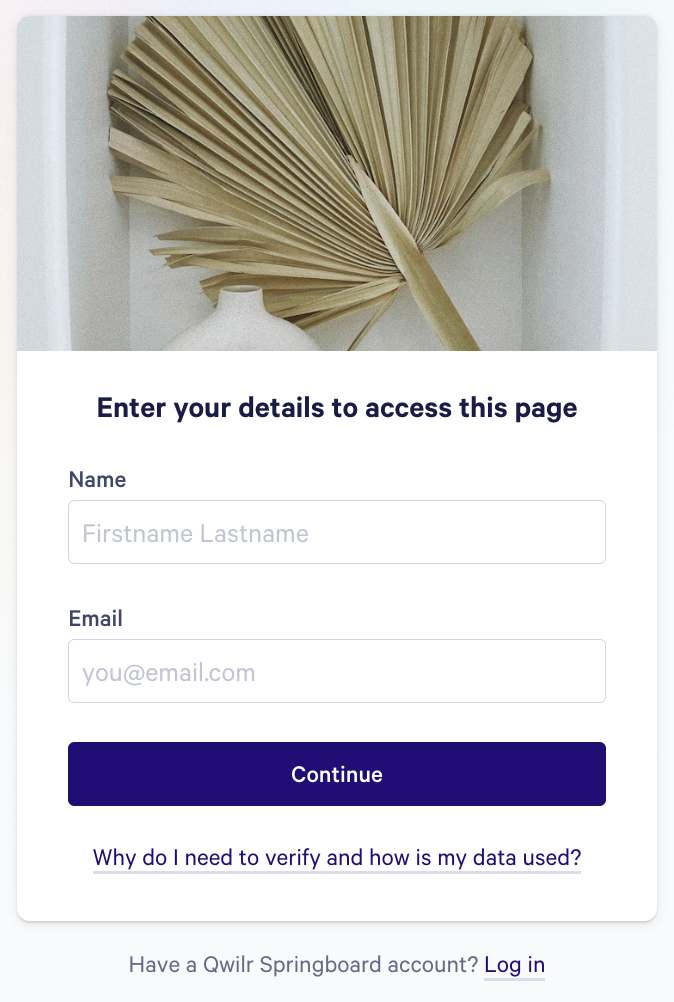
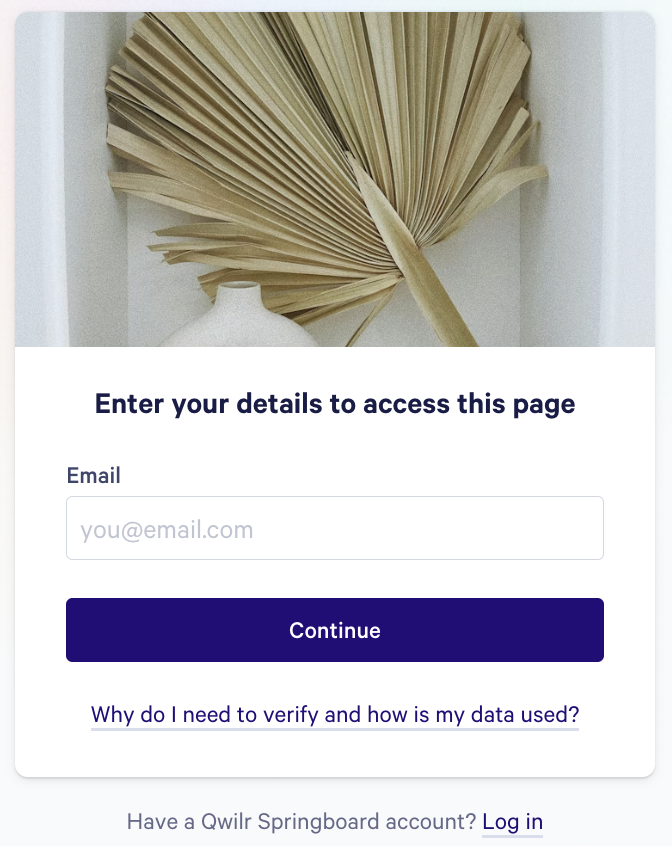
What your Buyer sees
Once you've enabled identity verification, your buyers will see this form when they visit your Page.
-
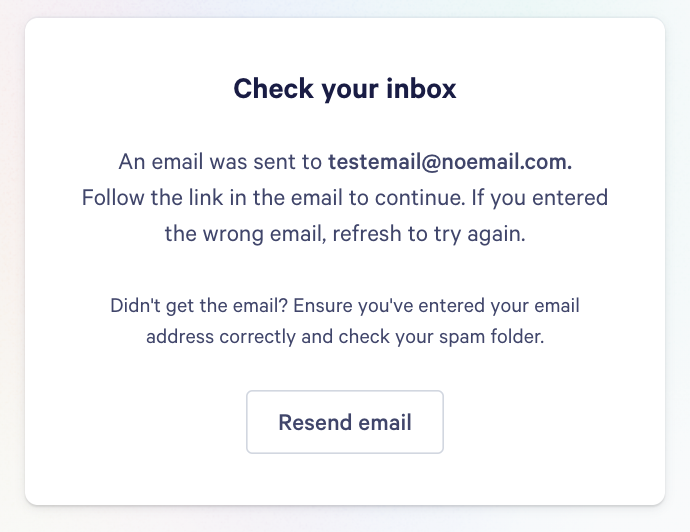
If your buyer chooses to authenticate with email, they'll enter their name and email address. Then they'll receive an email with a link to verify their email address. Once they've verified, they'll be able to view the Page.

Note: If your client has a Qwilr Springboard account, they can choose to log in with their existing Springboard Account to populate their name and email.
Restricting authentication to a specific email domain
For even more security, you can restrict verification to viewers with a certain email domain, or a set of domains.
To do this, head back to the security settings and set the page up for email verification as shown above. Then check the box for Domain Security, and enter the approved domain(s).
If you want to allow views from more than one domain, separate them with commas. You don't need to type the @ symbol.
Once someone has verified their identity and viewed your page, you'll be able to see this information within your page analytics.
Got questions? Reach out to the team at help@qwilr.com.