
HubSpot: Installation
In this guide, we'll show you how to set up our HubSpot integration so you can make personalized Qwilr Pages in seconds.
In this article
Note: You'll need admin access to your Qwilr account and Super Admin access to your HubSpot account for this installation.
Installation
To use HubSpot and Qwilr, you'll need to have an account on both services. The email address you use for both accounts will need to match. You can update your email address in Qwilr at any time.
Step 1. Head to the top right corner of the Qwilr dashboard. Click your initials, and then choose Add Integrations.

Step 2. On the Integrations page, choose HubSpot. Then click the Enable HubSpot button.

Note: If you enable the HubSpot integration, the HubSpot SSO in the Security setting will automatically be enabled.
A popup will appear and allow you to verify your HubSpot account. Then you'll see an Enabled status at the bottom of the integration settings.
Step 3. Next, head to your HubSpot account.
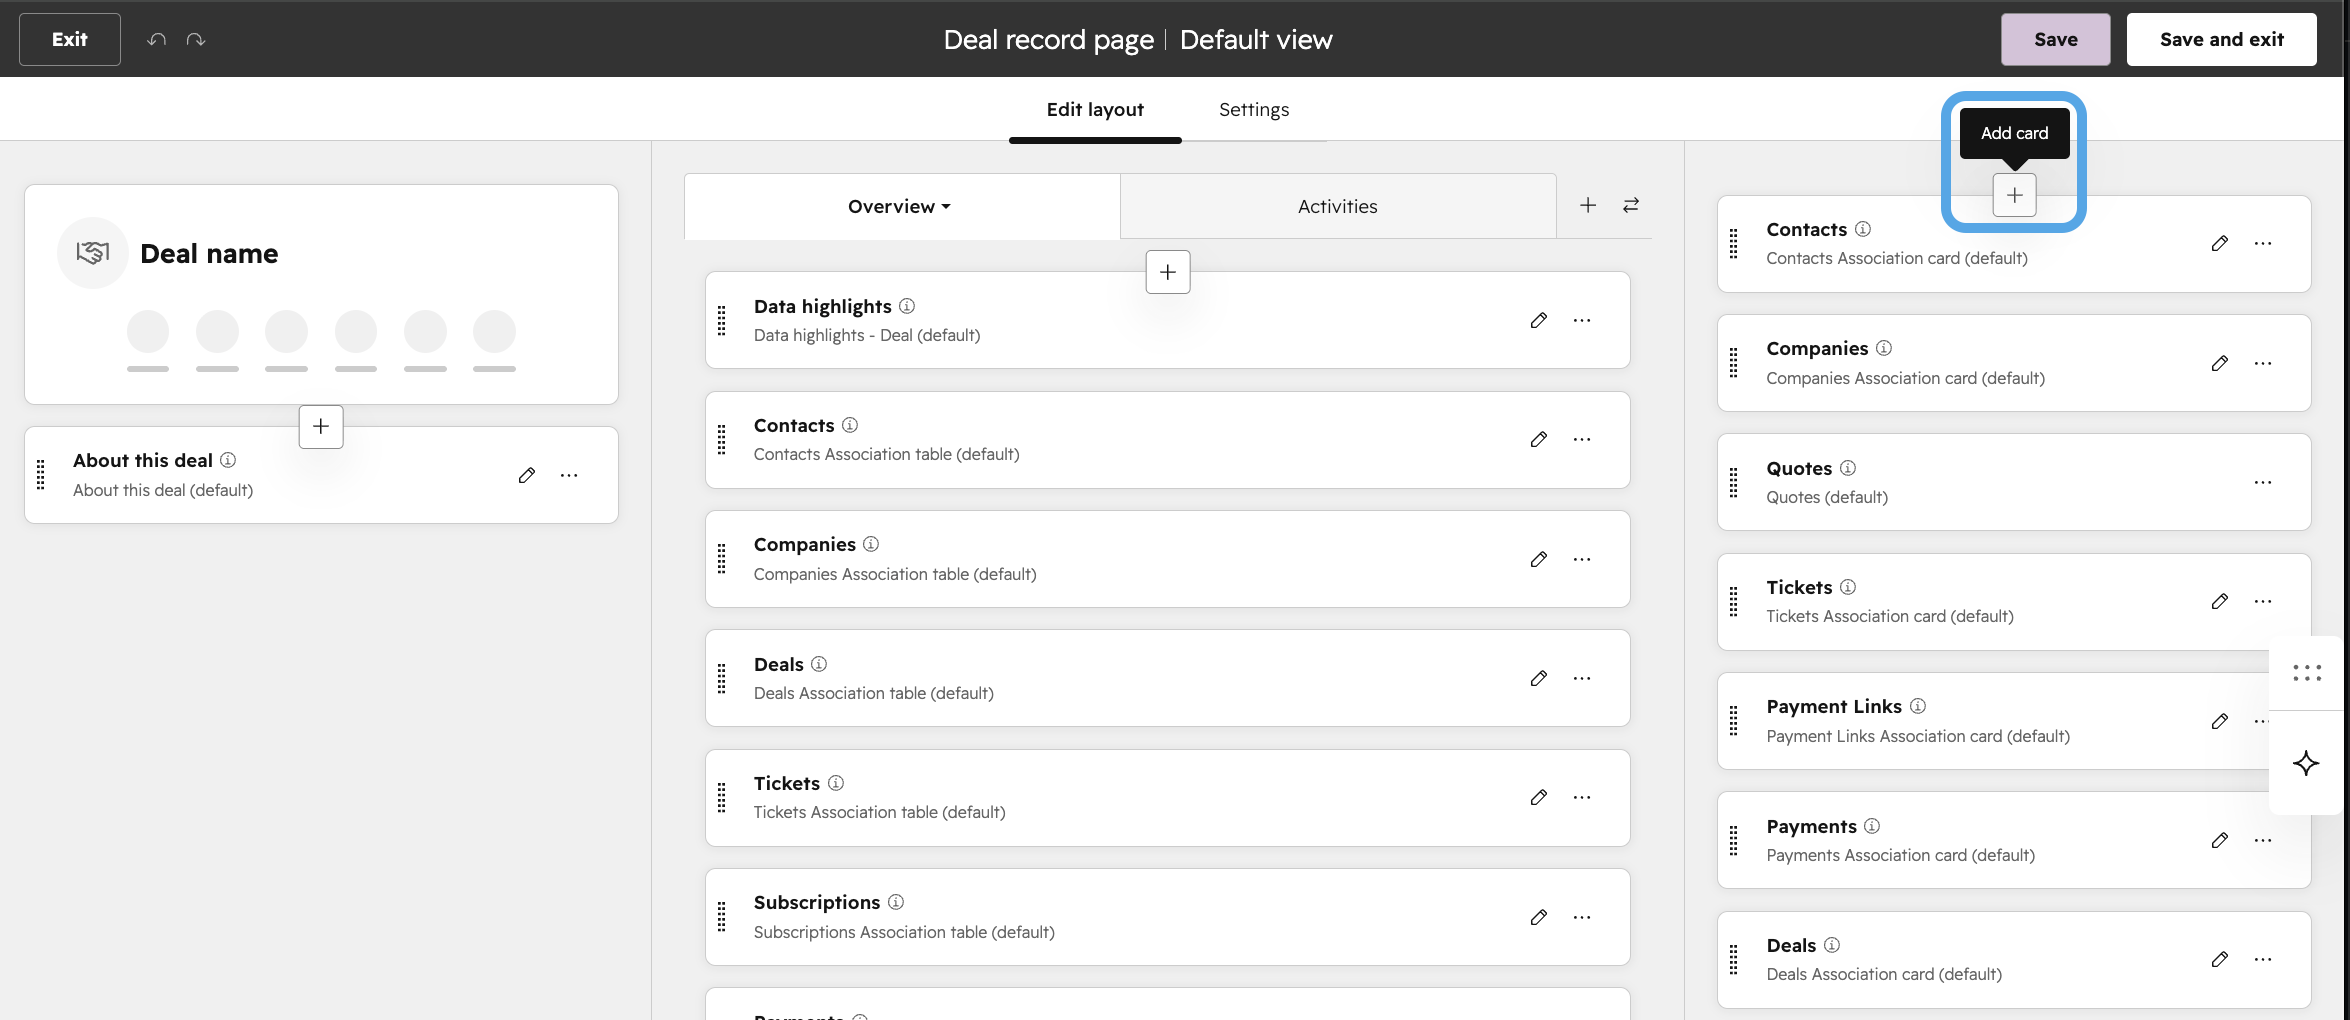
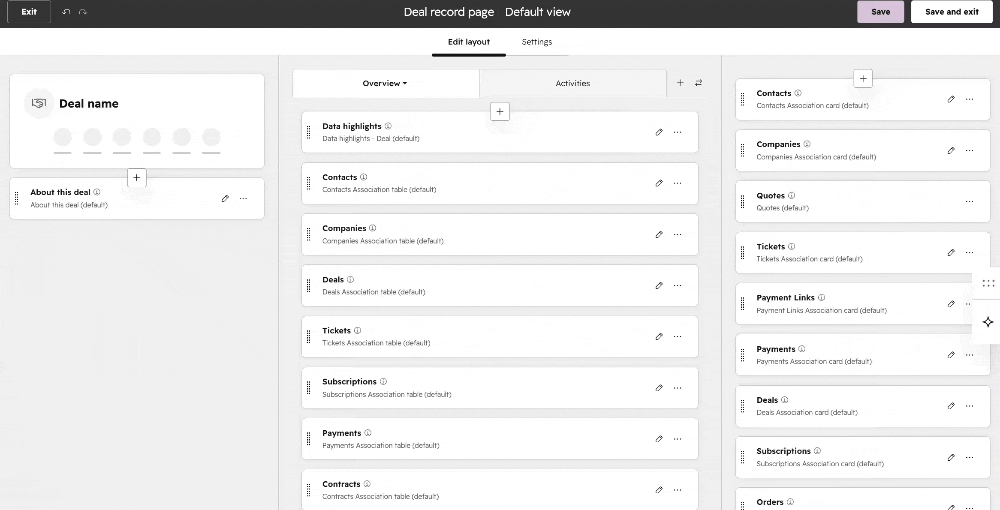
Note: If you are installing Qwilr for the first time, the Qwilr App Card will not be automatically added to your record view, you'll need to add it manually. You'll need Super Admin or Customize record page layout permissions to do this.
To add the Qwilr card to your record view:
-
Open any Contact, Company, or Deal record in HubSpot
-
At the top of the middle column, click Customize → Default view
-
Open the Card library / Add cards panel
-
Under Card types click Card Library and filter by Qwilr, then add the card
-
Save your view


Note: The Qwilr card will not appear under Settings > Objects > Record customization. It can only be added through the record page customization flow described above.
If you disable and re-enable the HubSpot integration from within Qwilr's settings, your Qwilr card will remain in your record view and no further action is needed. However, if you uninstall the Qwilr app directly from HubSpot and reinstall it, you will need to manually add the Qwilr card to your record view again following the steps above.
Disabling and Uninstalling the Qwilr Integration with HubSpot
Step 1. Head to the top right corner of the Qwilr dashboard. Click your initials, and then choose Add Integrations.
Step 2. On the Integrations page, choose HubSpot. Then click the Disable button.

Step 3. Log into your HubSpot account, go the Marketplace icon in the top right and select Connected Apps.

Step 4. Find the Qwilr app and select the Actions dropdown and click Uninstall.
You will get a confirmation prompt to type uninstall in the text field and then click Uninstall again.
Steps 3 and 4 can also be found on HubSpot's knowledge base article here: Connect Apps to HubSpot
Note: Removing the app in HubSpot will disconnect all existing Qwilr pages from their attached records. This is not reversible. Simply disabling and re-enabling the Qwilr integration under Qwilr's settings will not cause this issue.
What's Next?
Now that you have the integration set up, it's time to create a HubSpot template in Qwilr.
Need help? Contact us at help@qwilr.com and we'd be happy to assist!