
Salesforce V2: Installation Guide
The Salesforce V2 integration lets you connect Qwilr with Salesforce so you can use the Qwilr widget inside Salesforce and access Qwilr actions directly from your Salesforce records. Don't worry if you've never used Salesforce before, we'll take it step by step.

Before you start:
- This integration is only available on our Scale (and legacy Enterprise) plan
- You'll need to be an Admin in Qwilr and be an Administrator in Salesforce who can install packages; typically a System Administrator.
- Each team member who creates pages needs their own Qwilr user seat to access the integration.
In this article:
- Installing the Qwilr App in Salesforce
- Adding the Qwilr Component to your Salesforce records
- Connecting the Integration
- Working with the Salesforce sandbox environment
- Handling individual team member Authorization errors
- Uninstalling Qwilr from Salesforce
Installing the Qwilr App in Salesforce
Note: If you already have the legacy version of the Qwilr Salesforce integration installed, please review the Upgrade to V2 help doc. This is intended for new Salesforce users who have not previously installed the Salesforce integration.
The integration is powered by the Qwilr Proposals package, which you install into your Salesforce org. Install it first as the connection step below can't complete until the package is in place.
Step 1. Open the Qwilr Proposals install link and follow the prompts:
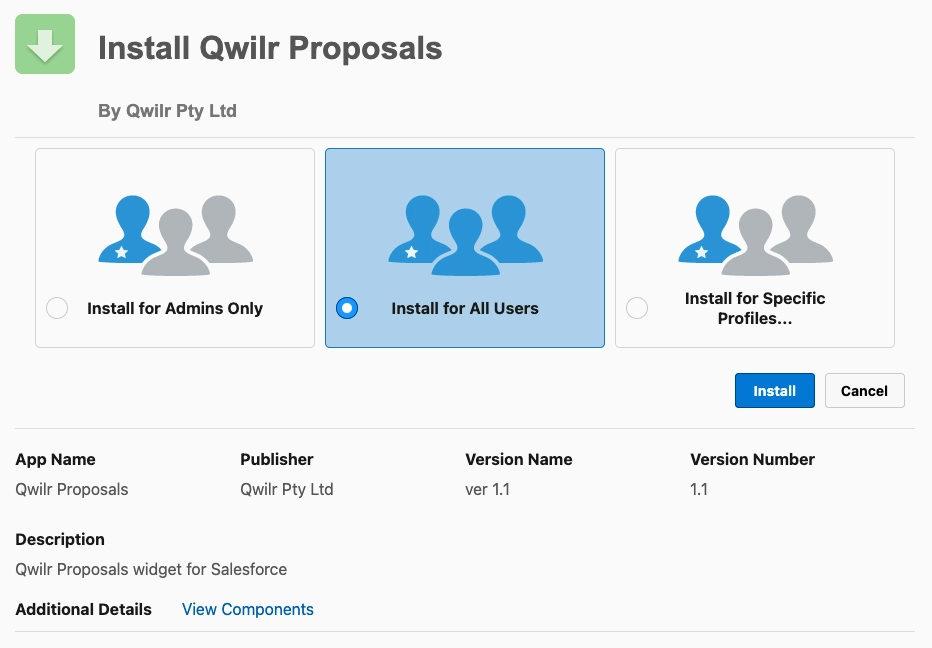
Make sure to install for All Users. The Application should notify you with an Installation Complete! message when it is done.
Step 2. That's it — the package is ready.
Installing it automatically assigns the Qwilr Proposals permission set to your active standard users, so all of your team can see the Qwilr component once it's added to a page layout.
If you add users later, or some team members can't see the component, assign them the Qwilr Proposals permission set in Salesforce Setup.
Adding the Qwilr Component to your Salesforce records
The package includes the Qwilr Proposals component, which sits on your Opportunity, Account, Contact, and Lead records. This is so your users can create and track pages directly inside a Salesforce Record without having to navigate inside of Qwilr. Here's how to choose where it appears.
For Lightning
For this example, we'll be using an Opportunity record but the process is the same for all four Record types.
Step 1. Open an Opportunity Record you are looking to add the Qwilr Integration to and select the gear icon toward the top right, then select Edit Page.
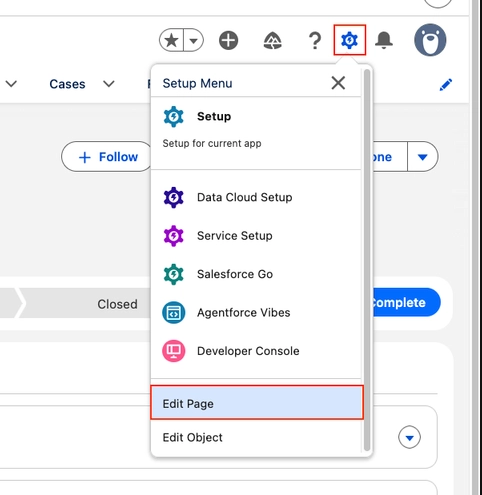
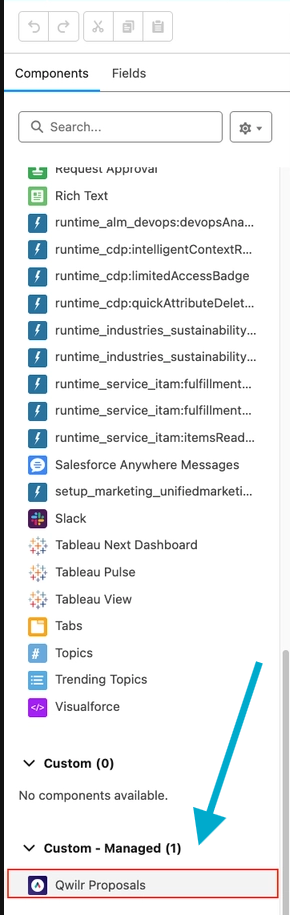
Step 2. In the Lightning App Builder, search the component list on the left for Qwilr Proposals, and drag it where you'd like it to appear. We think the right sidebar works well.
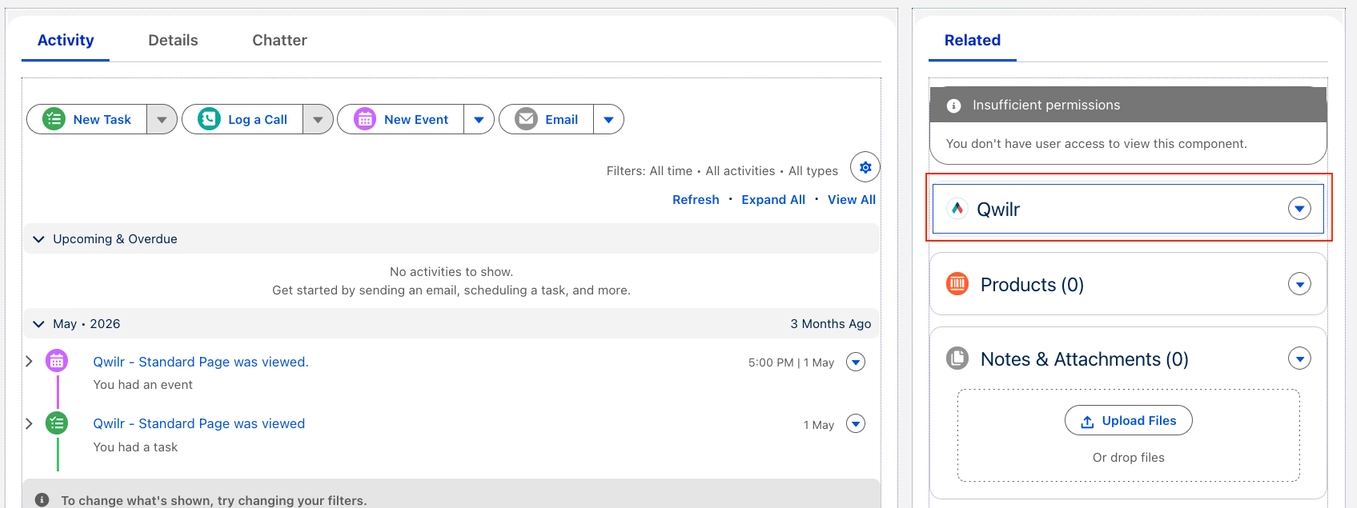
Note: If you see any messaging around Insufficient Permissions - you can ignore it until you have finalized the full integration setup. There are steps that will clear this message later in this help doc.
Step 3. Now Save and Activate the page (both buttons appear in the top right corner). If Activation appears greyed out, click Save first; Salesforce enables it after the first save.
You will go through several menus to progress through Activation.
- First, the Activation Opportunity Record Page where you select Assign as Org Default.
- Second, the Assign form factor page where you will select Desktop.
- Third, the Review assignment page to confirm and save.
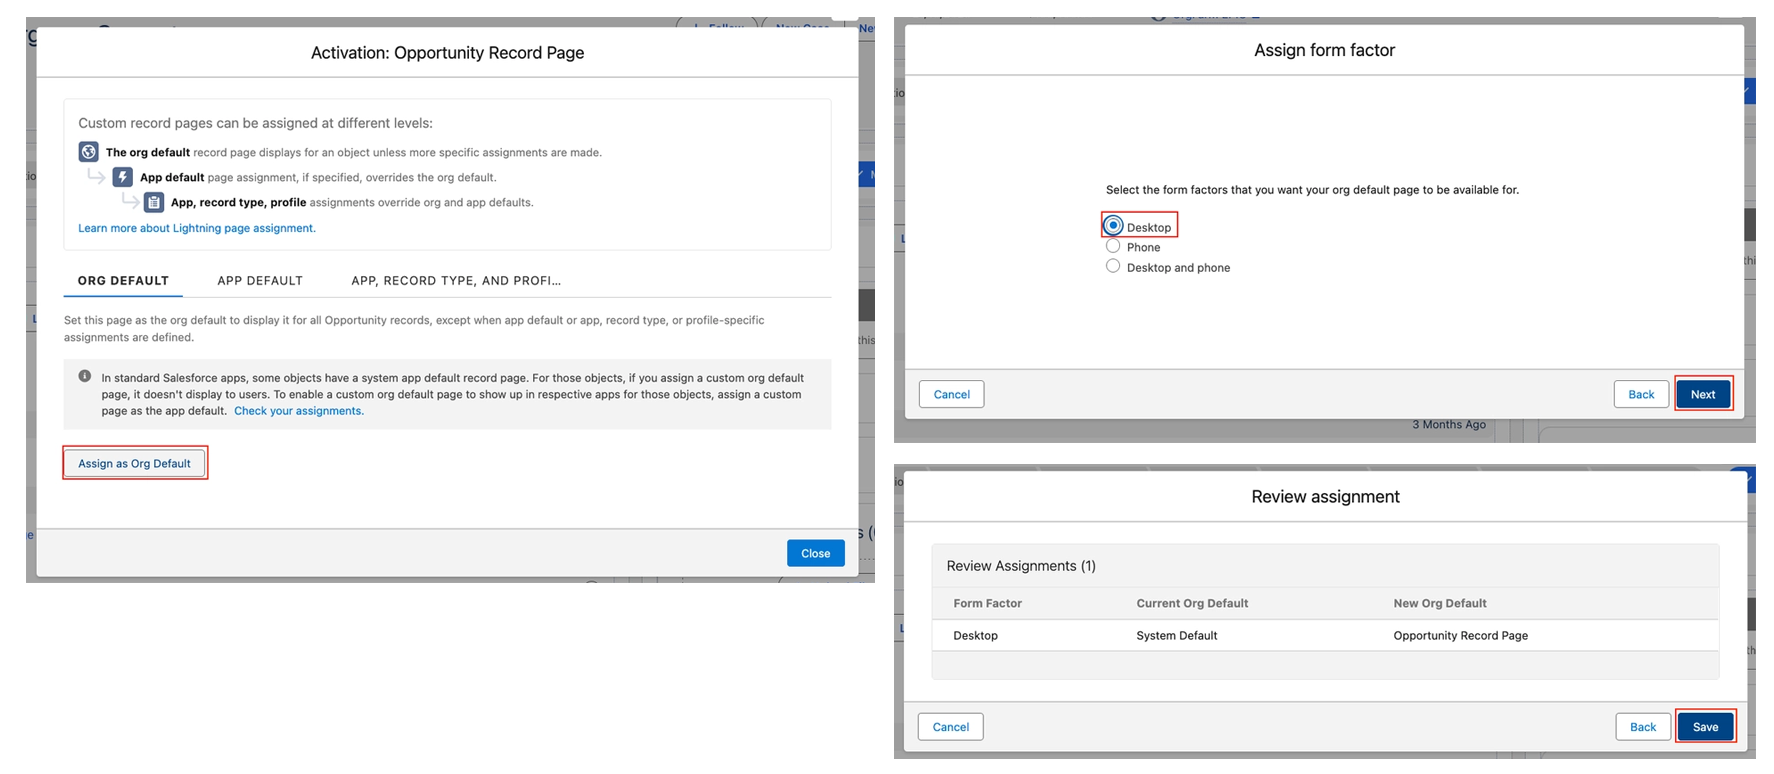
You can then head back to your Opportunity record and should now see the Qwilr widget in your right-column menu.
For Classic
In this example, we’ll show how to add Qwilr to the Contact layout. These same steps can also be applied to Account, Opportunity, and Lead pages.
Step 1. To get started, go to any Contact record. Click Edit Layout in the top right corner.

Step 2. In the Contact layout tab, select the Visualforce Pages option (you may need to scroll down to see it). From here, choose Section and drag it to the place you'd like it to appear on your Contact page.

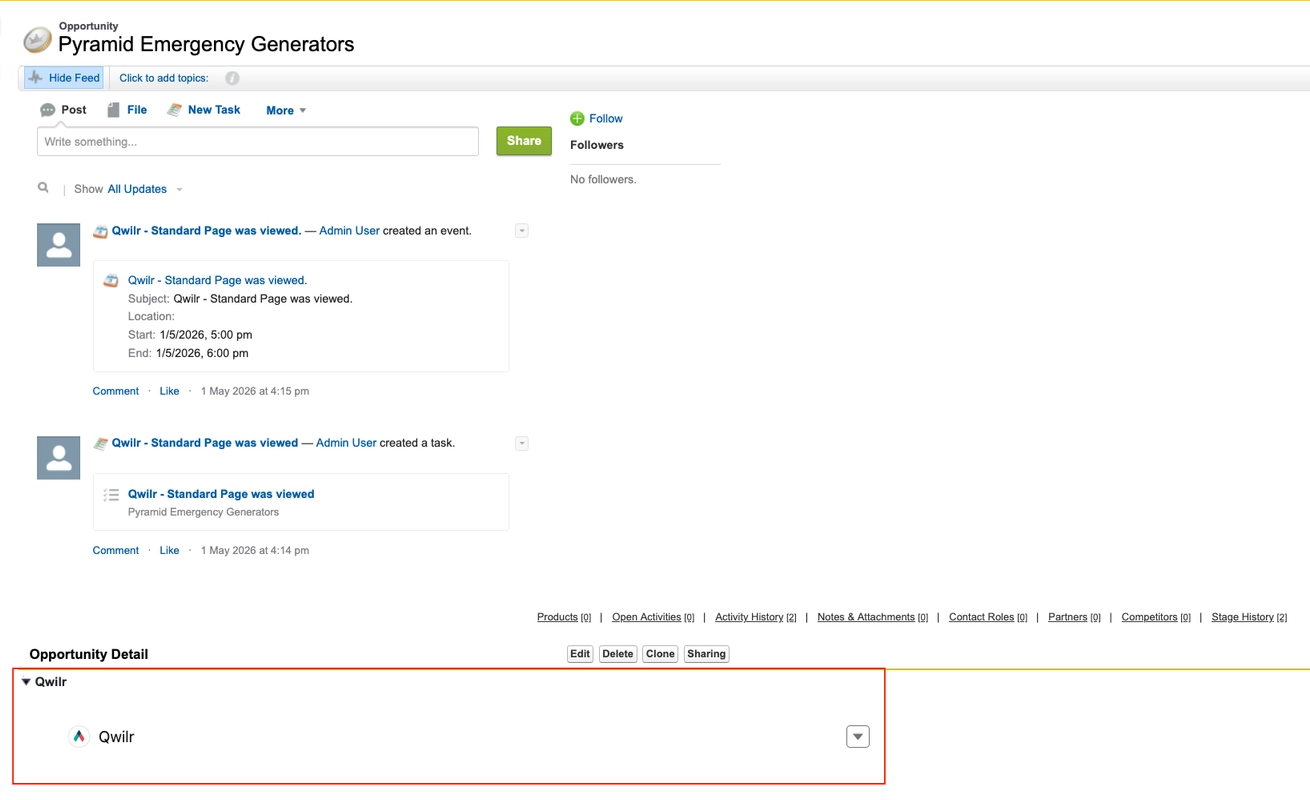
Step 3. Name the Section "Qwilr" and select the 1-Column Layout. Then click OK. Then drag the Qwilr_Contact block from the Object Manager into your new section.
Step 4. From there, click the wrench icon in the top right corner of the new section. Change the height to 350 pixels and click Show Scrollbars.
Step 5. Click OK. Once that's done, you'll see the Qwilr widget in each Contact record.
Connecting the Integration
You can connect from either side; Qwilr or Salesforce. Both end in the same place, so use whichever you have open. Either way, the Qwilr Proposals package needs to be installed first.
Connecting from Qwilr
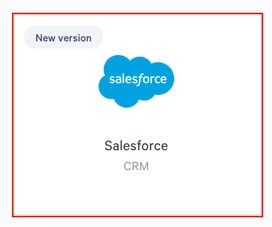
Step 1. Click Integrations from the left side navigation menu on your Qwilr dashboard. Then, find the Salesforce tile, marked New version, and click it.
Step 2. Click Enable Salesforce. A Salesforce pop-up opens and asks you to sign in and approve the access Qwilr needs.
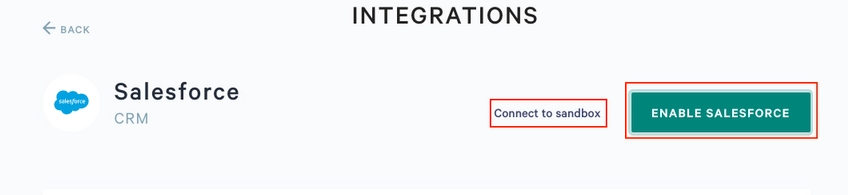
Connecting to a sandbox? Use the Connect to sandbox button instead, which takes you to the Salesforce sandbox sign-in. The integration connects to one Salesforce environment at a time, so pick the one you'll be working in.
Step 3. Enter your Salesforce login information and you will see the Allow Access menu.
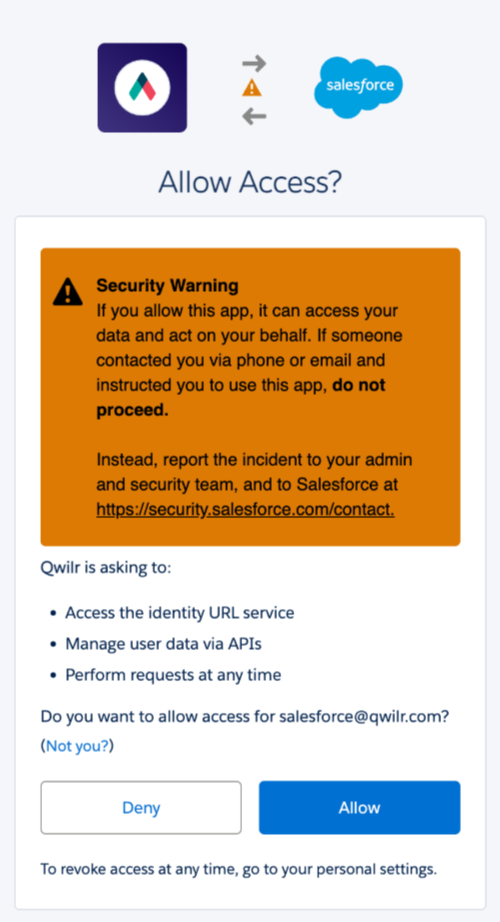
Nothing happened when you clicked Enable? The connection opens in a pop-up window, so check your web browser isn't blocking it.
Step 4. Once Allowed and approved, you will return to the Integration showing as Enabled.
Connecting from Salesforce
You'll need the Qwilr Proposals component on your record pages from the above section.
Step 1. Open any Account, Contact, Lead or Opportunity record and find the Qwilr Proposals component you've added previously.
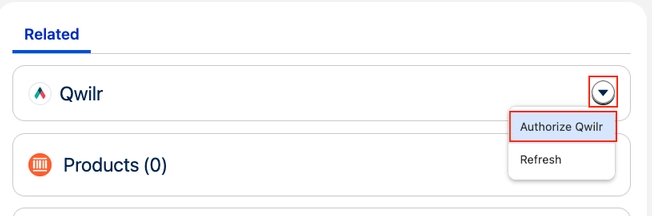
Step 2. Click Authorize Qwilr. A new tab opens in Qwilr.
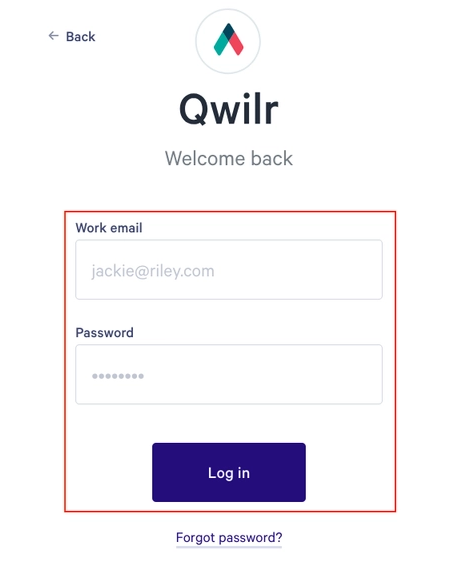
Step 3. Sign in to Qwilr and approve the connection. Remember, on top of being an Administrator in Salesforce, you will also need to be an Admin in Qwilr. You will then be taken through the Salesforce sign-in to finish linking the two. See the following screens.
If you're working in a sandbox, the flow routes to the sandbox sign-in automatically.
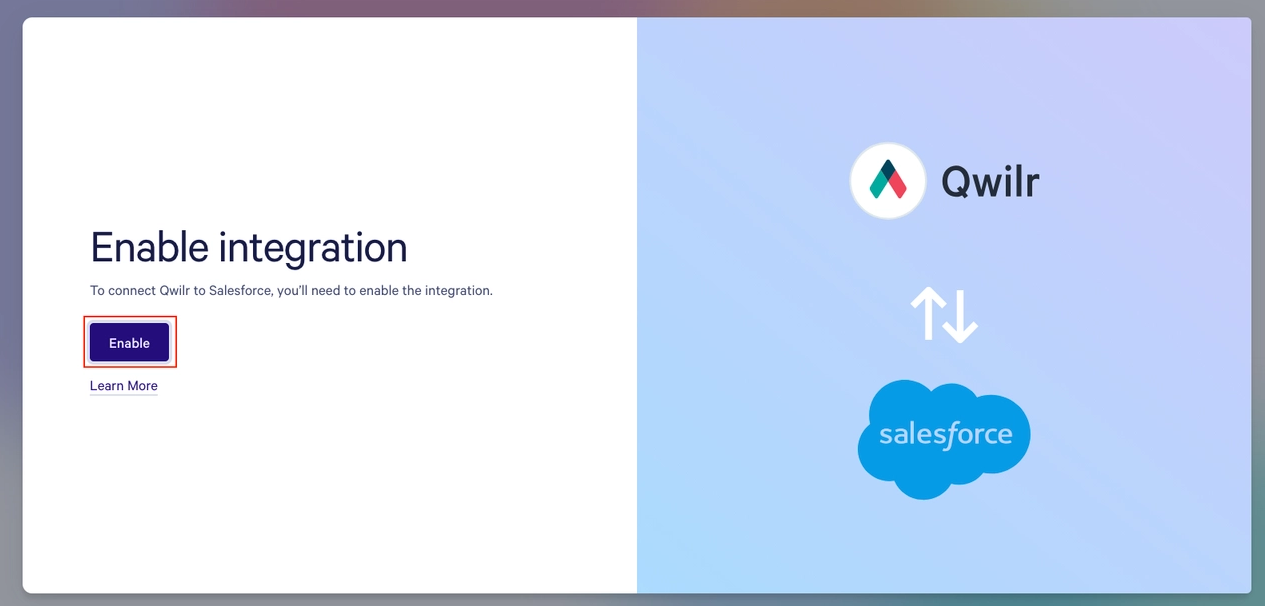
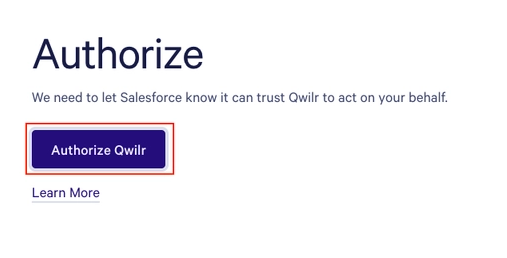
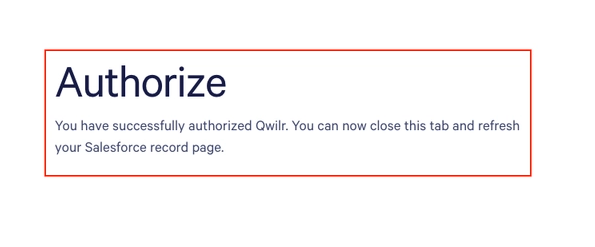
Step 4. Now that the Qwilr integration is authorized, head back to Salesforce and refresh your record. You will now see the Qwilr Integration Widget in your Salesforce record with Create new page at the top.
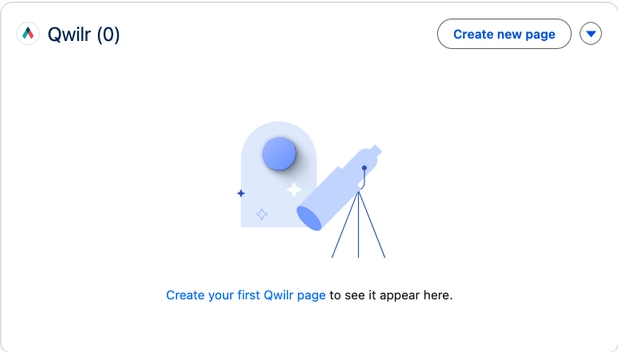
After that, each team member authorizes once with their own Qwilr account, from the same Authorize Qwilr button.
You're all set up! Next, head over to Salesforce V2: Creating Templates and Pages to build your first Salesforce Template and start creating Pages from your records.
Working with the Salesforce sandbox environment
Salesforce teams can click on the new Connect to Sandbox button (next to the existing Enable button - see screenshot below) to enable the SF integration using their Salesforce sandbox account. Make sure to review the above connection instructions and to have already installed Qwilr in your sandbox environment using this link.

Note: You'll see a check-mark next to Connected to sandbox to confirm you're connected to your sandbox environment.
Once done with testing in the sandbox to move to production, teams will disable the integration and re-enable it using the existing disable then enable button.

Note: We can only support 1 environment at a time. See the list of considerations below.
Considerations when testing in this manner:
- When switching from sandbox to production, if teams have set up the "update opportunity fields from page details" automation (more on that here) it might not work properly in production if the opportunity fields mapped in the automation don't exist in the production environment.
- If teams switch from production to sandbox, existing automations that have been working in production will stop updating their production opportunity fields.
Handling individual team member Authorization errors
Installing the Qwilr Proposals package and adding the widget to a page layout gets you most of the way there — but there's one more step for each person on your team (other than the admin) before the widget will actually work for them.
Every Salesforce user needs to connect their own Salesforce account to their Qwilr account. This isn't something that happens automatically for the whole org — each person has to do it individually. Until they do, they won't be able to see any linked Qwilr pages on the widget. The fix is simple: just click Authorize in the context menu.
Why you might see an error
Because each user has to authorize separately (other than the admin), you'll typically see an authorization error the first time someone opens a record where the widget has been added — that's just part of the normal flow, not a sign anything's broken.
That said, these errors show up more often in Salesforce orgs that have customized user profiles or permissions. Those customizations can sometimes get in the way of Qwilr and Salesforce properly linking the user accounts.
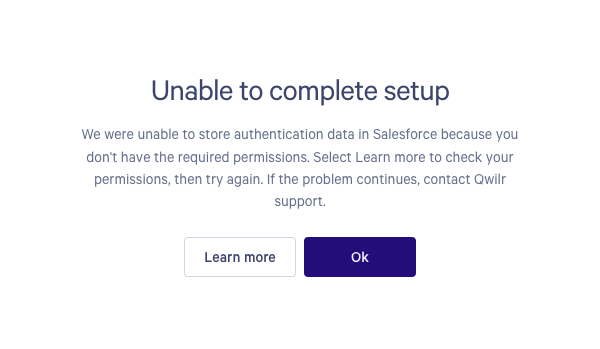
The Salesforce Admin needs to ensure the user has all the required permissions in order to use the widget.
Step 1. In Salesforce, go to Setup.

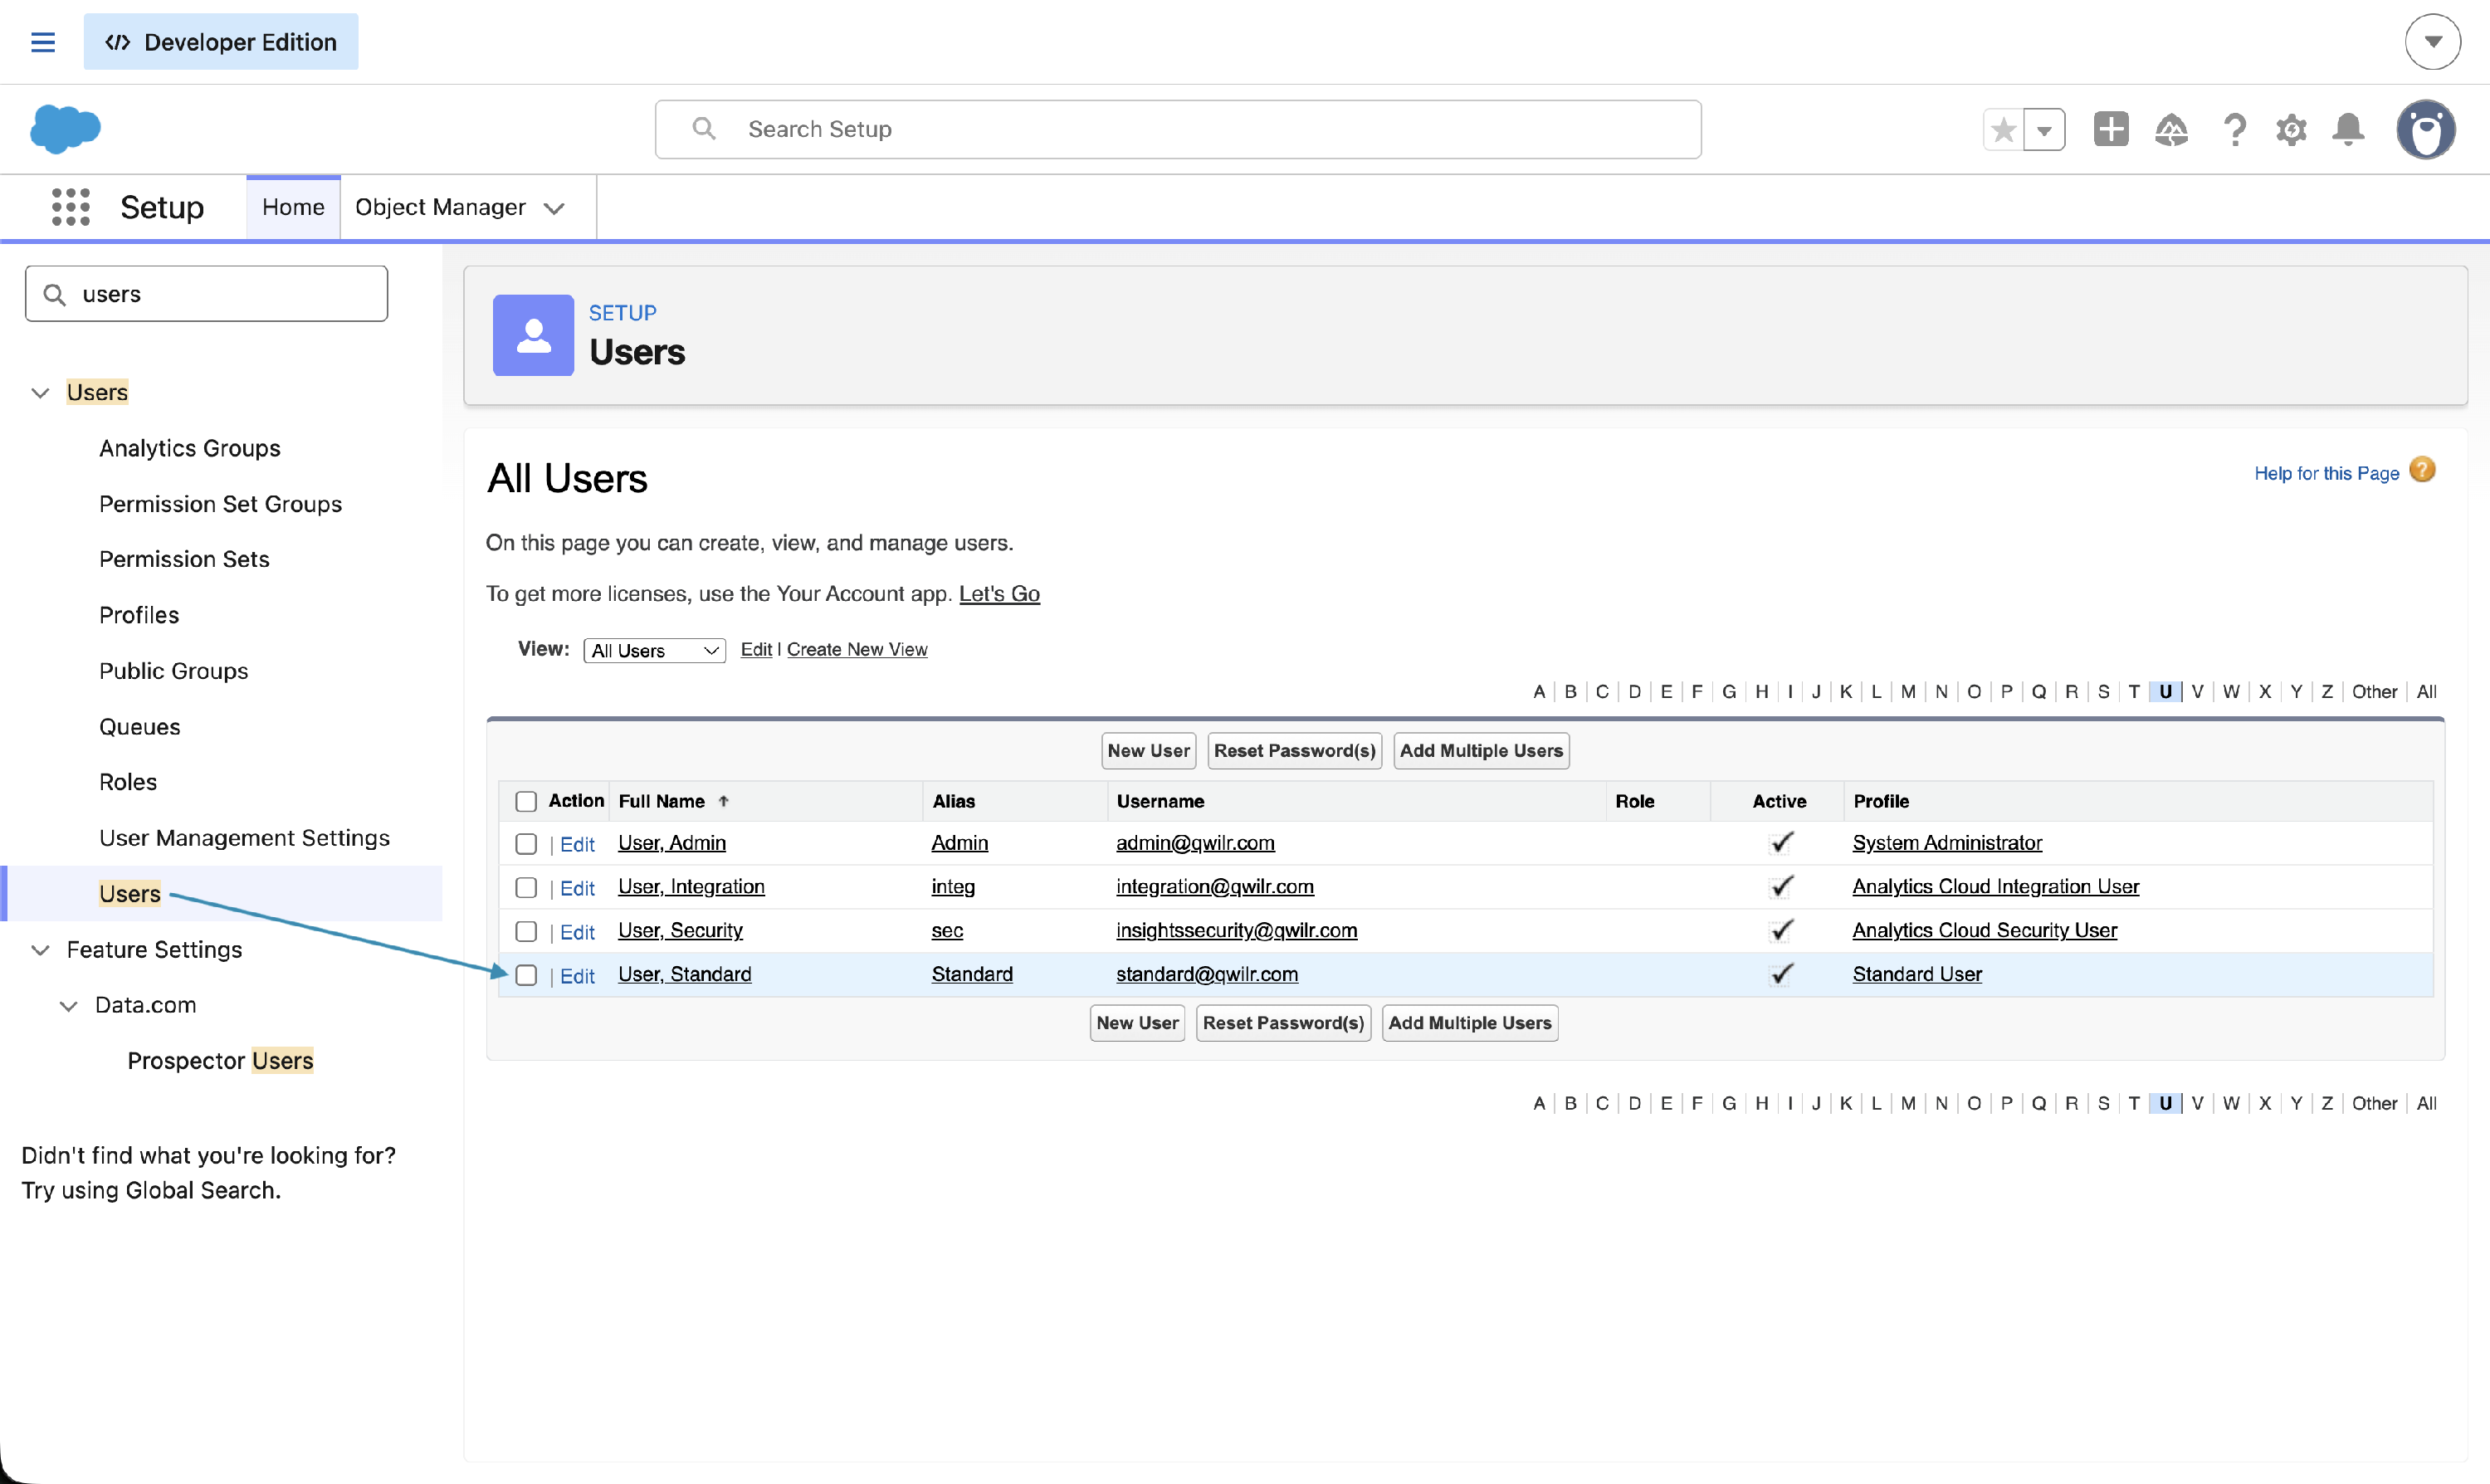
Step 2. In the Quick Find box, search for Users and select the specific user.
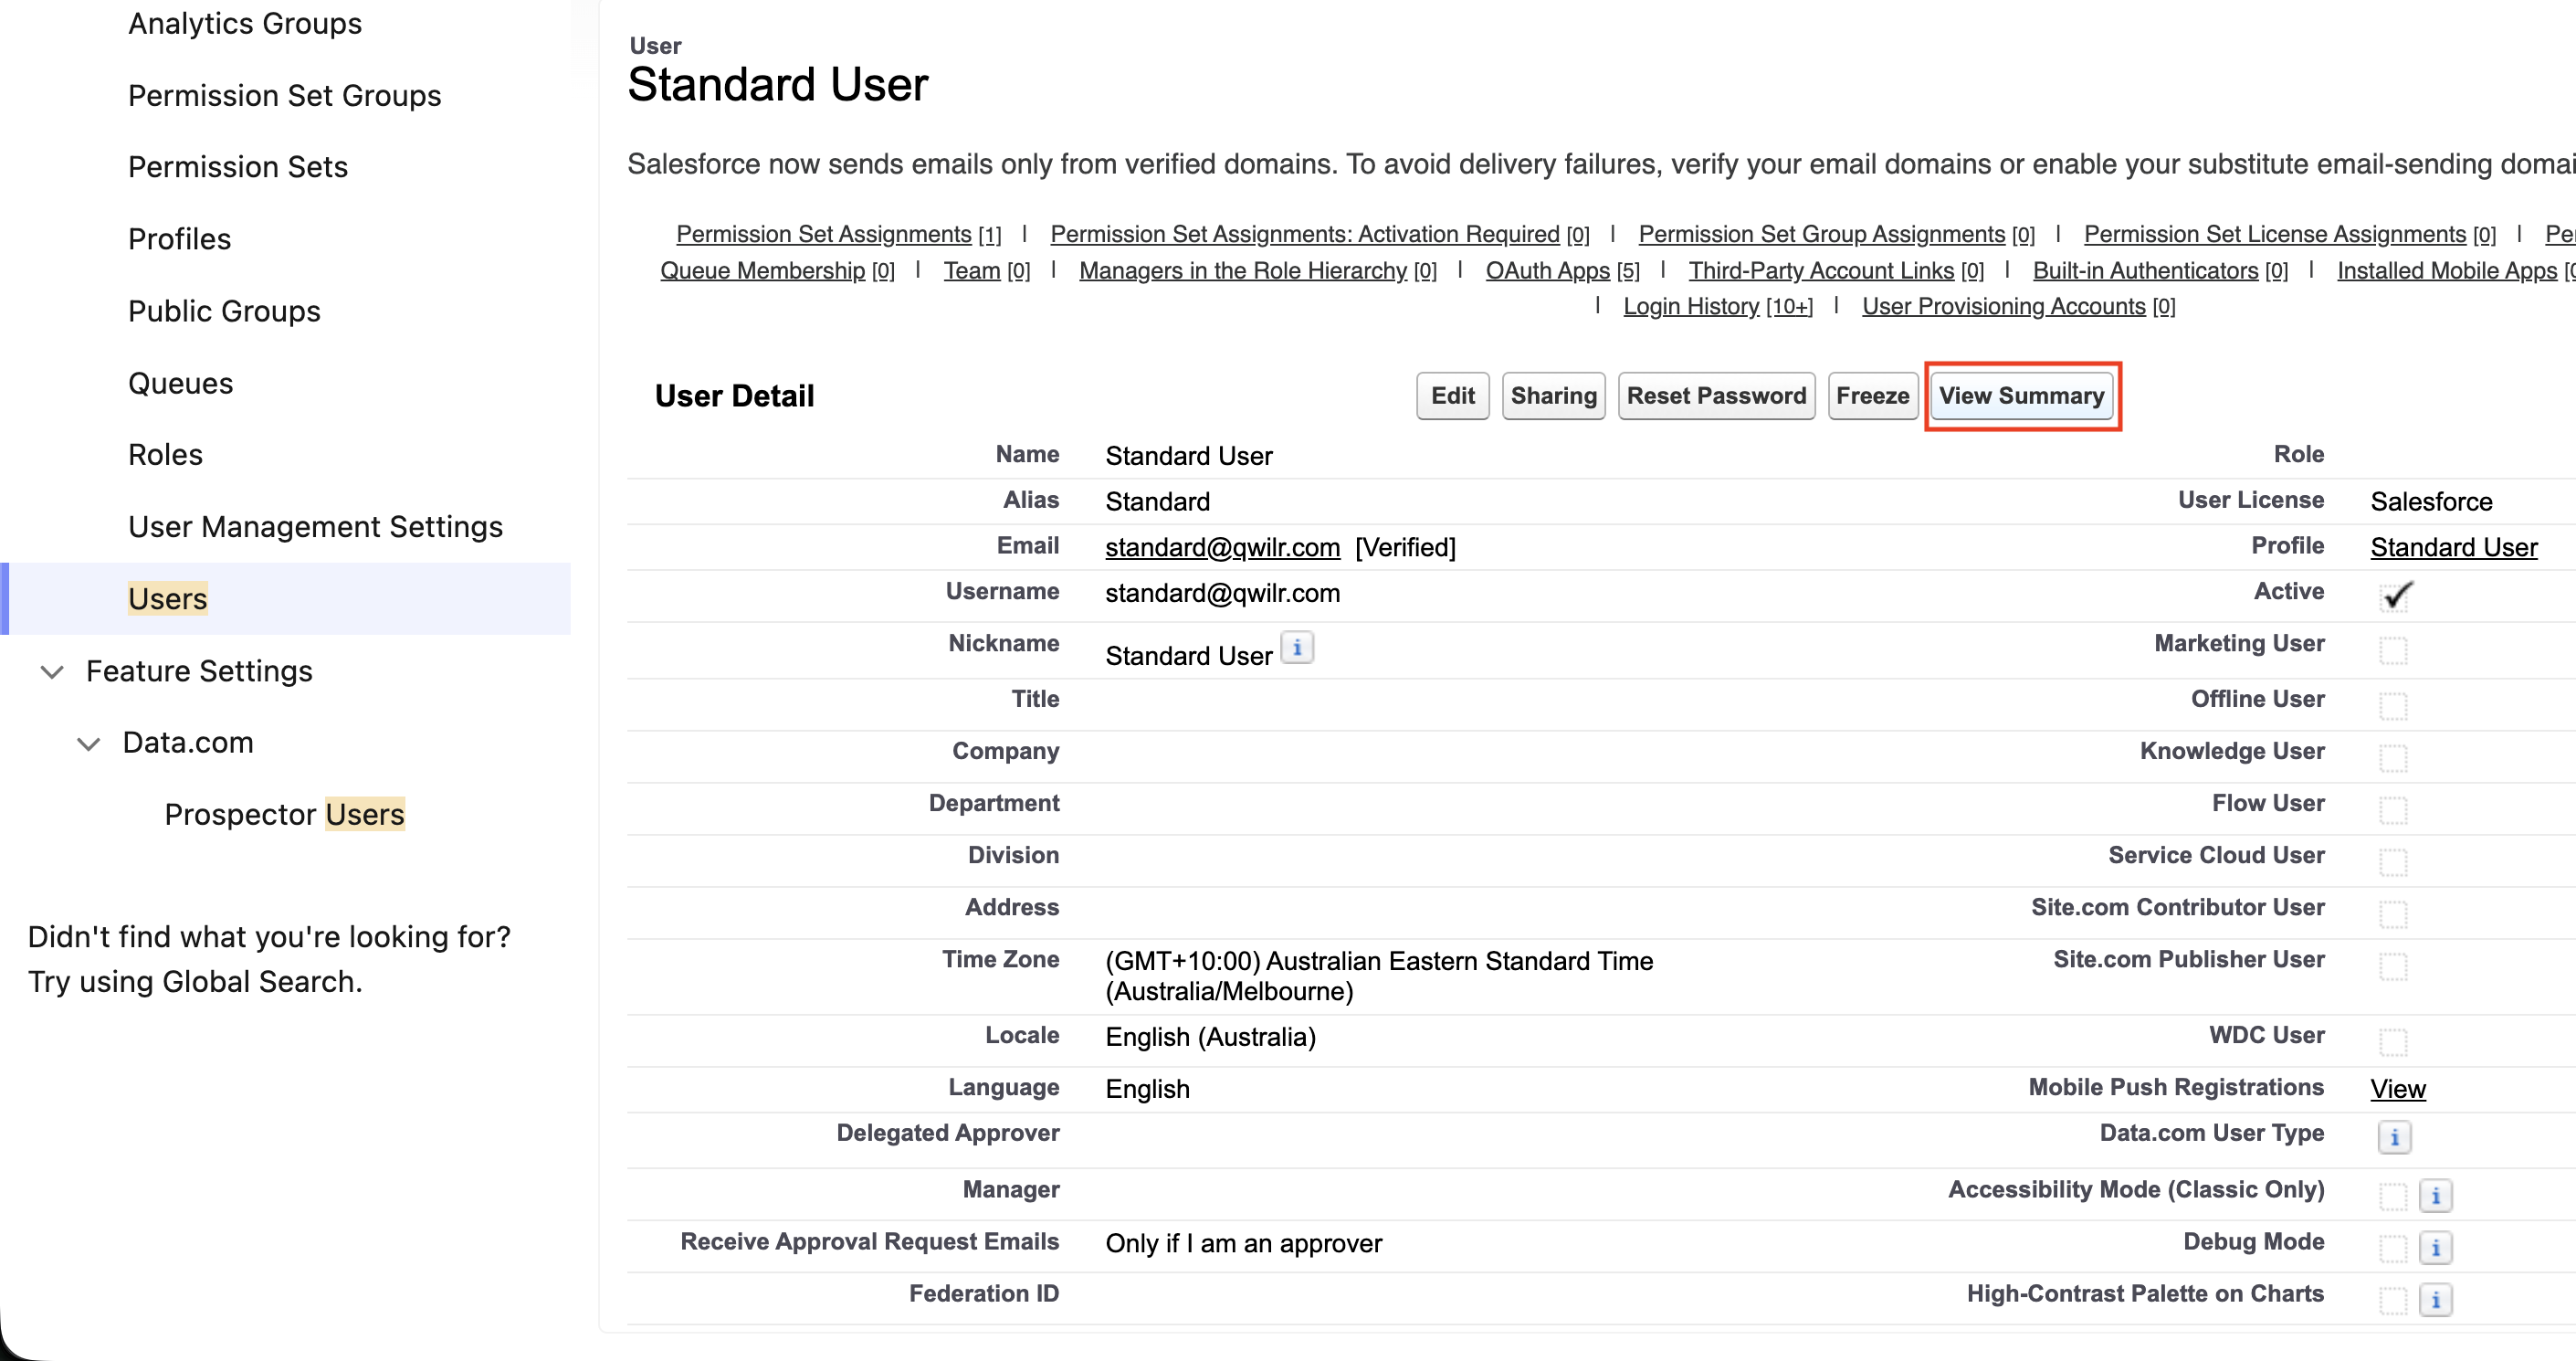
Step 3. Select View Summary and navigate to the User Access Summary section.
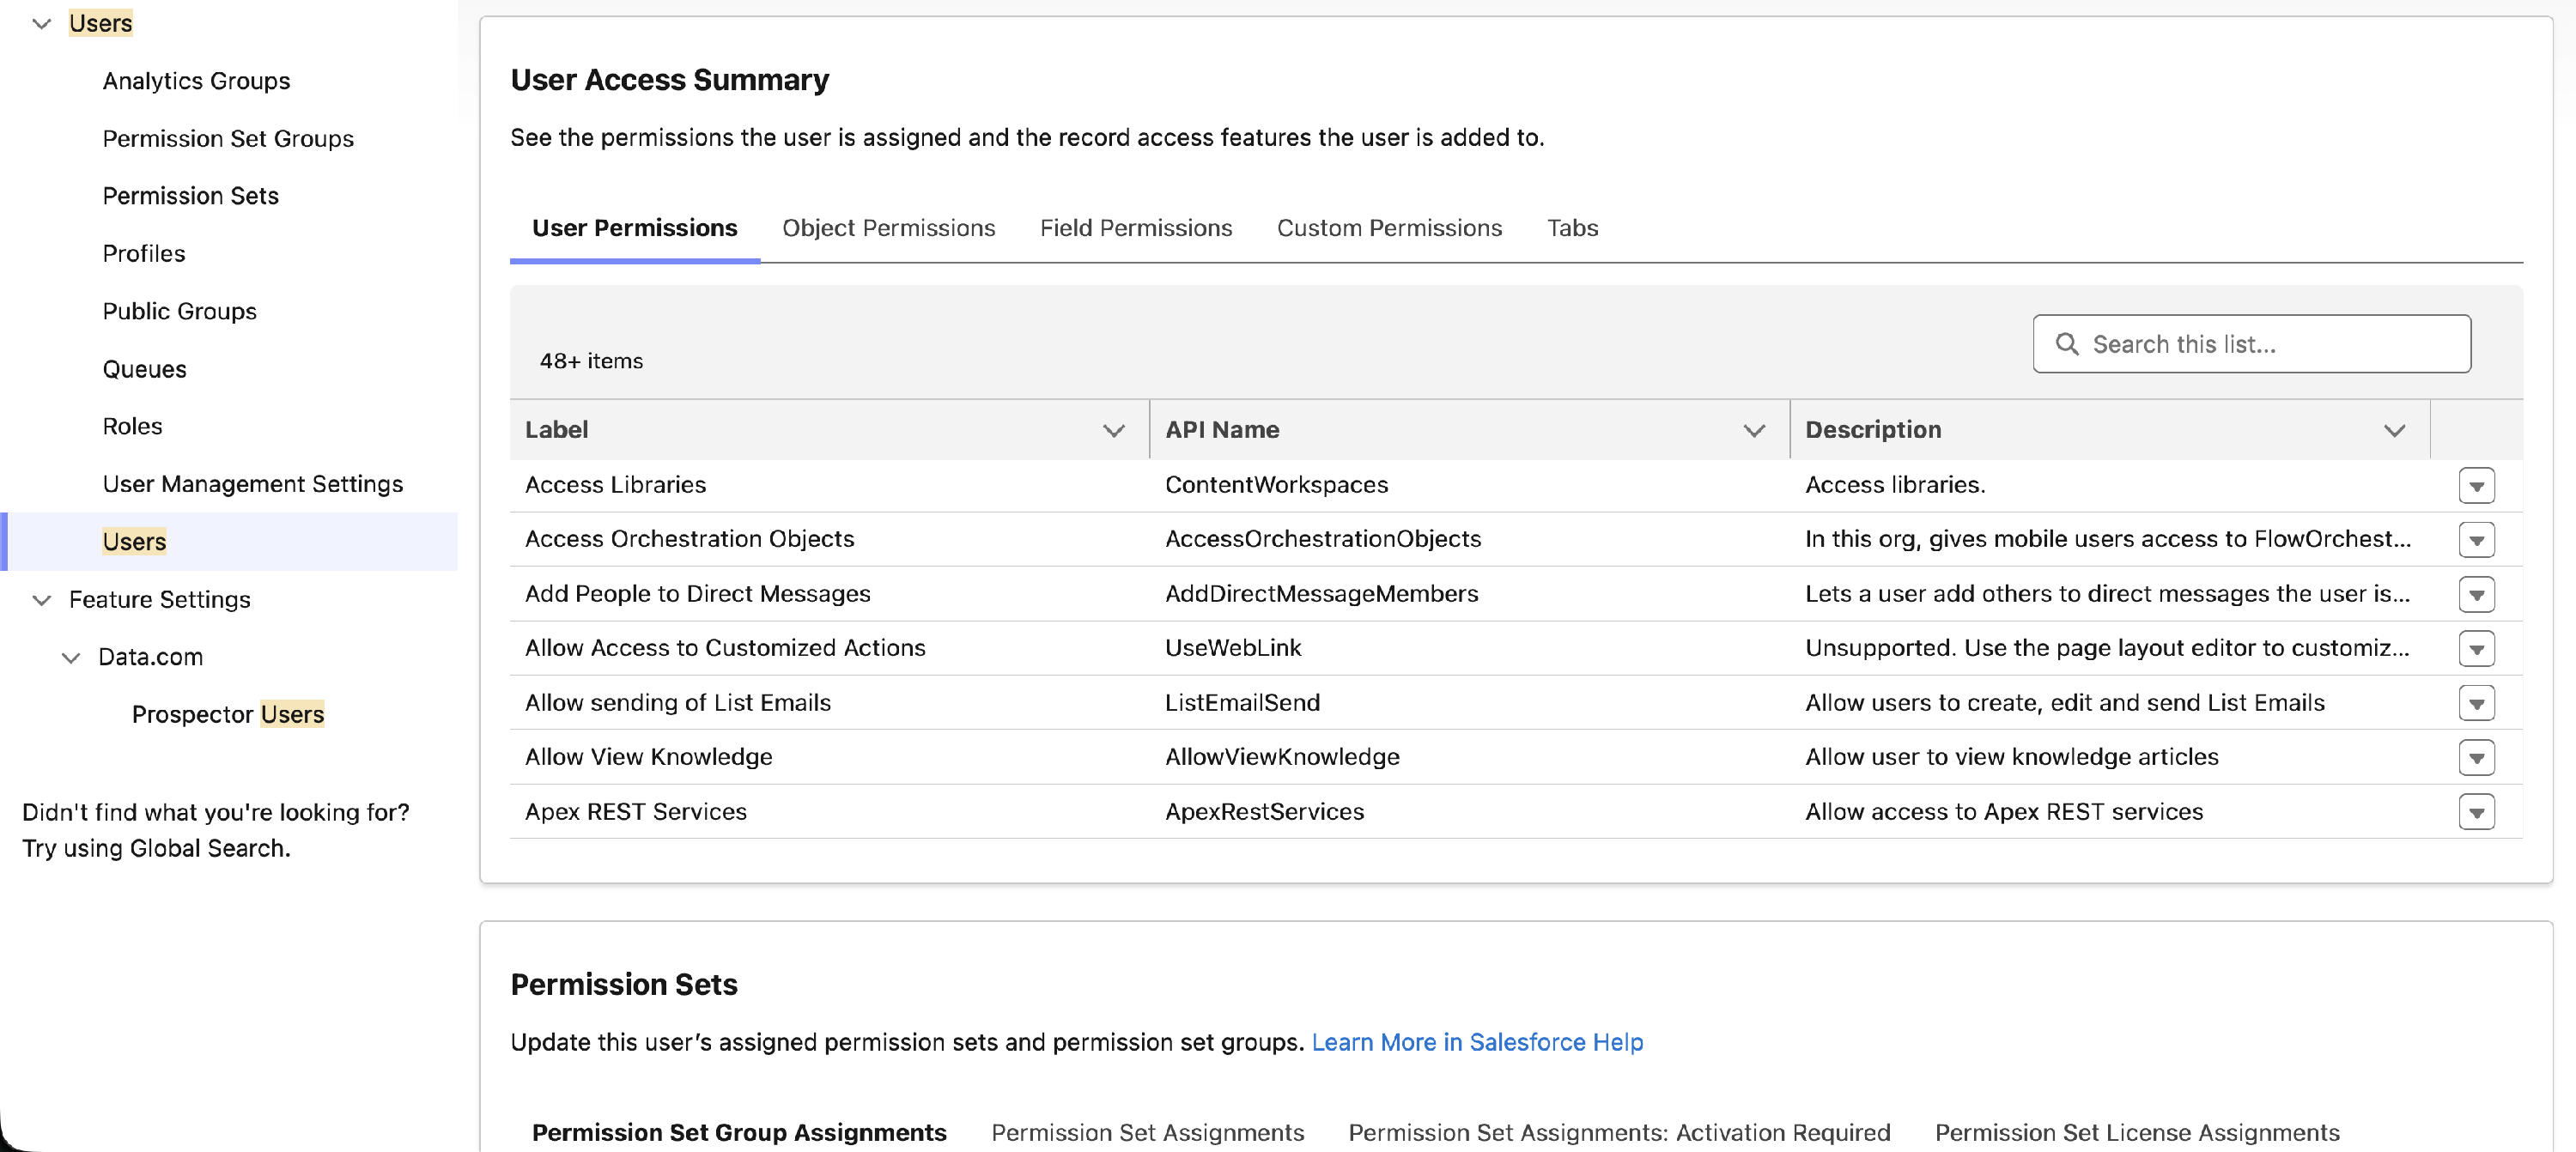
Step 4. From here you can check if all the permissions required for the widget and per user authorization to work are correctly assigned.
-
API Enabled - Required to retrieve and update data
User External Credentials
- Read - Required for the widget to access authentication data to communicate with Qwilr.
- Edit - Required to allow Qwilr to update authentication data on behalf of users to maintain security best practices.
- View Setup and Configuration - Required in Salesforce to allow users to create user credential records. Note that this permission is only required for initial authorization and is not required once the user has successfully authorized.
- Read on Account / Contact / Lead / Opportunity records - As needed in order for the user to view the relevant CRM records.




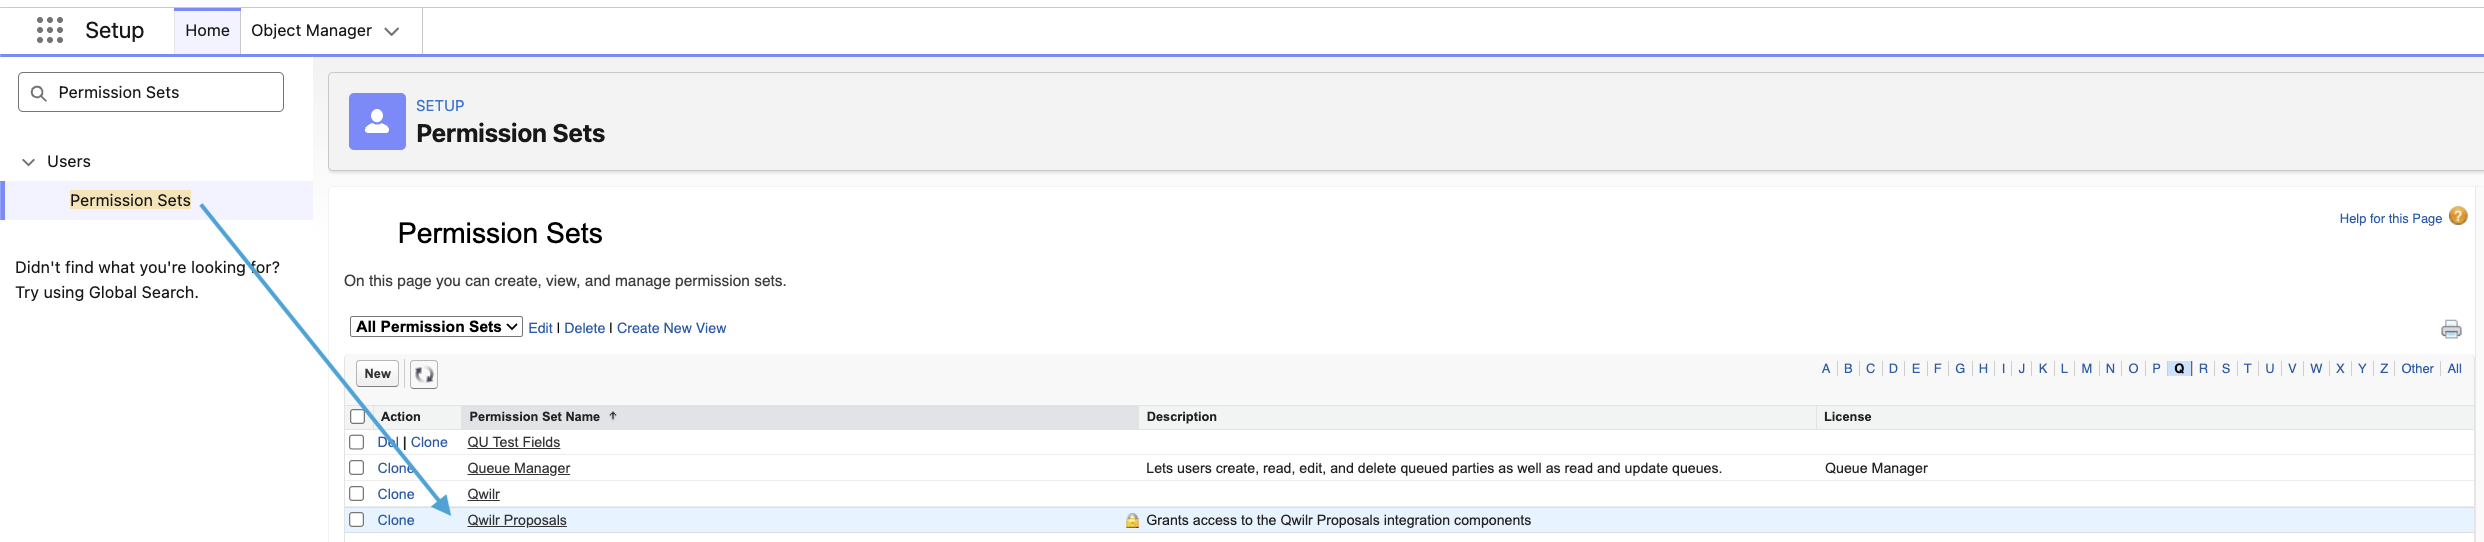
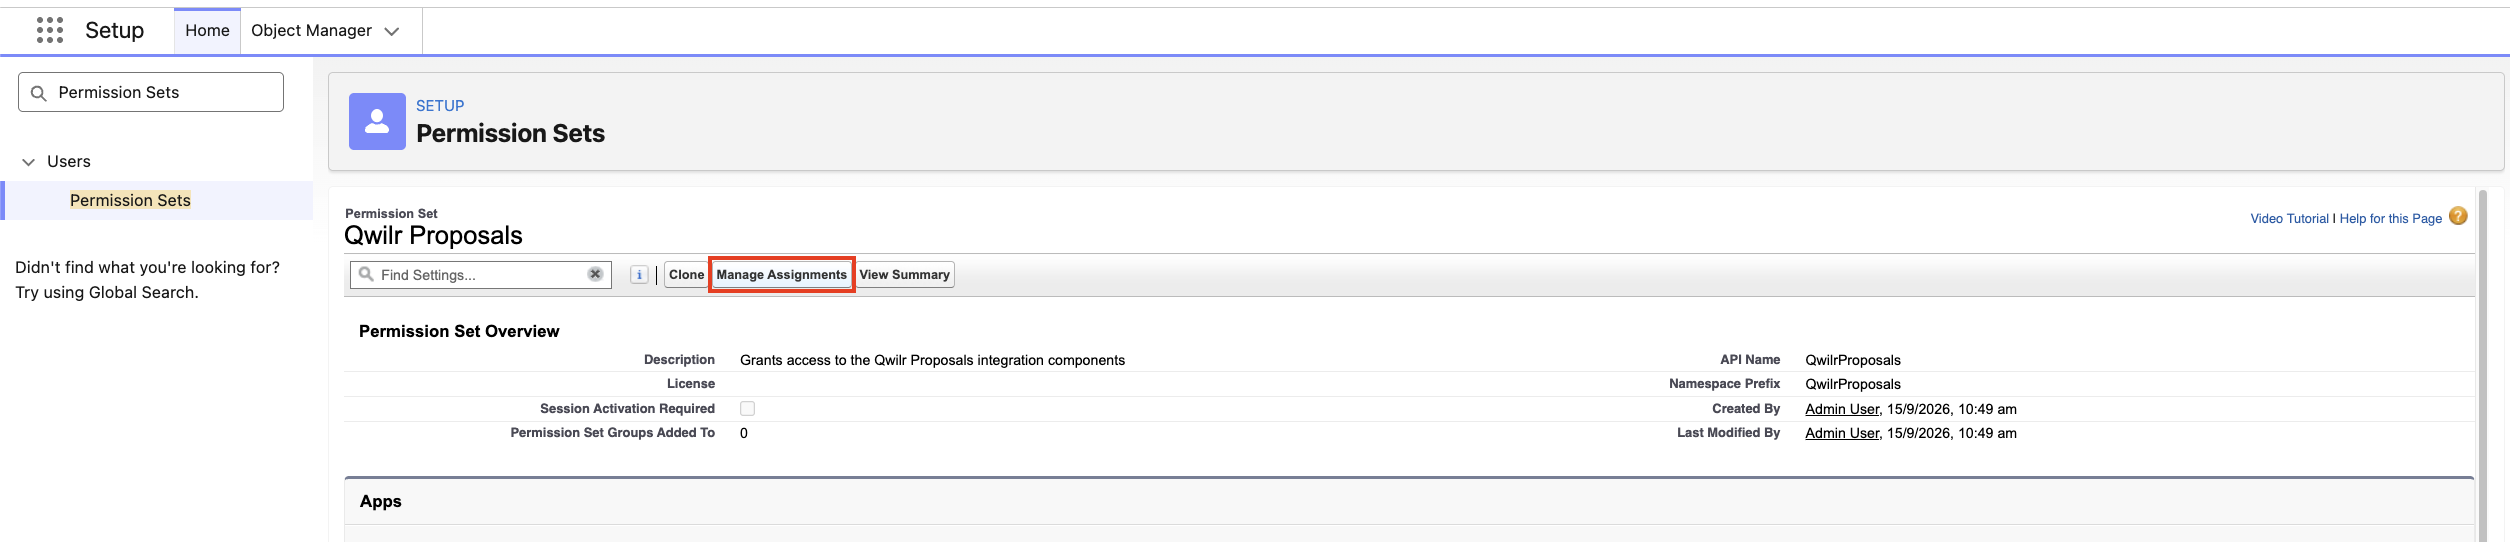
Step 5. For the following error, make sure the user has the Qwilr Proposals Permission Set assigned.
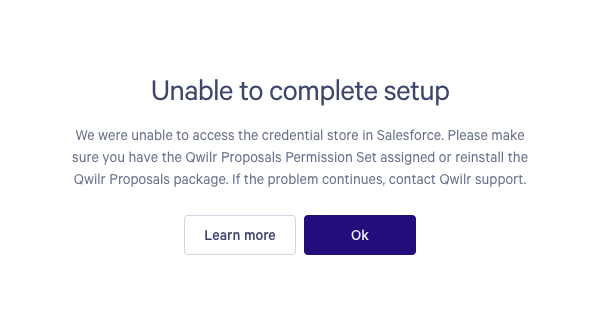
In Salesforce Setup, use the Quick Find search to find and navigate to Permission Sets.
Find the Qwilr Proposals Permission Set and view the assignments.

Uninstalling Qwilr from Salesforce
If you ever need to remove the Qwilr widget from Salesforce, there are three parts to it. Salesforce requires some of the below steps before it'll let you uninstall the package. Work through them in order and you'll be done in just a few minutes.
- Remove the widget from your page layouts
- Remove users from the Qwilr permission set
- Uninstall the Qwilr package
Part 1: Remove the widget from your page layouts
First, take the Qwilr widget off any record layouts you added it to earlier (Opportunity, Lead, Contact, or Account).
- Open any record where you added the Qwilr widget (for example, an Opportunity).
- In the top right corner, click Setup which is the gear icon ⚙️ and choose Edit Page.
- Click on the Qwilr widget on the page. You'll see a small delete icon 🗑️ at the top of the widget, click it to remove the widget from the layout.
- Click Save in the top right.
Note: If you added the widget to more than one record type (like Contacts, Accounts, or Leads), repeat these steps for each one. The widget needs to be removed from every layout before you can uninstall the package.
Part 2: Remove users from the Qwilr permission set
Next, unassign any users from the Qwilr permission set. Salesforce needs this cleared out before it'll let you uninstall.
- Go to Setup.
- In the Quick Find search box, type Permission Sets and click it.
- The permission sets are listed alphabetically. Click Q along the top to jump to that letter, then click Qwilr Proposals.
- Click Manage Assignments.
- Select all the users in the list, click the trash icon 🗑️ (or Remove Assignments), and confirm.
Once the list is empty, you're ready to uninstall the package.
Part 3: Uninstall the Qwilr package
- Go to Setup.
- In the Quick Find search box, type Installed Packages and click it.
- Find Qwilr Proposals in the list and click Uninstall next to it.
- Scroll to the bottom of the page and select Do not save a copy of this package's data after uninstall. Click ok on the pop up to confirm.
- Tick the box that says Yes, I want to uninstall this package and permanently delete all associated components.
- Click Uninstall.
Salesforce will now process the uninstall, this can take a few minutes. Once it's done, you'll receive a confirmation email.
Need help? Contact us at help@qwilr.com and we'd be happy to assist!