
Salesforce V2: Creating Templates and Pages
Ready to build proposals that fill themselves in? Qwilr's Salesforce integration pulls data straight from your Opportunity, Account, Contact, and Lead records, so every Page starts personalized.
This guide covers building your first Salesforce Template and creating Pages from your Salesforce records.
Before you start:
- The Salesforce integration needs to be installed and connected before you can build templates or create pages. If that hasn't been done yet, start with Salesforce V2: Installation Guide. It walks your admin through installing the Qwilr Proposals package, adding the Qwilr component to your records, and connecting the integration. Come back here once that's done.
- This integration is only available to Scale (and legacy Enterprise) plan customers.
In this article:
- Creating a Salesforce-connected Template
- Adding Variables
- Creating your Qwilr Page inside Salesforce
- Creating your Qwilr Page with a Salesforce Record from inside Qwilr
Creating a Salesforce-connected Template
Step 1. Click Templates in the left side navigation menu and click Create blank template. If you already have a Qwilr Page you'd like to reuse, open it instead and choose Convert to Template in the top right.
Step 2. In the Template, click the Variables icon in the top right.

Step 3. Select the CRM tab and click Link CRM to template.

Step 4. Choose Salesforce, then pick the record type this Template is built for; Account, Contact, Lead or Opportunity, and click Continue. The Variables panel will now list your Salesforce fields.

Note: For our Scale account, Smart Proposal Engine users can alternatively select Add data source and select a record type from the Salesforce record submenu. Learn more about the Smart Proposal Engine here.

Note: A Template can only be used with the record type it's linked to. Opportunity Templates will only appear in Opportunity records in Salesforce to create pages from.
Adding Salesforce Variables
With the Template linked, the Variables panel lists every Salesforce field that's been made available to your account.
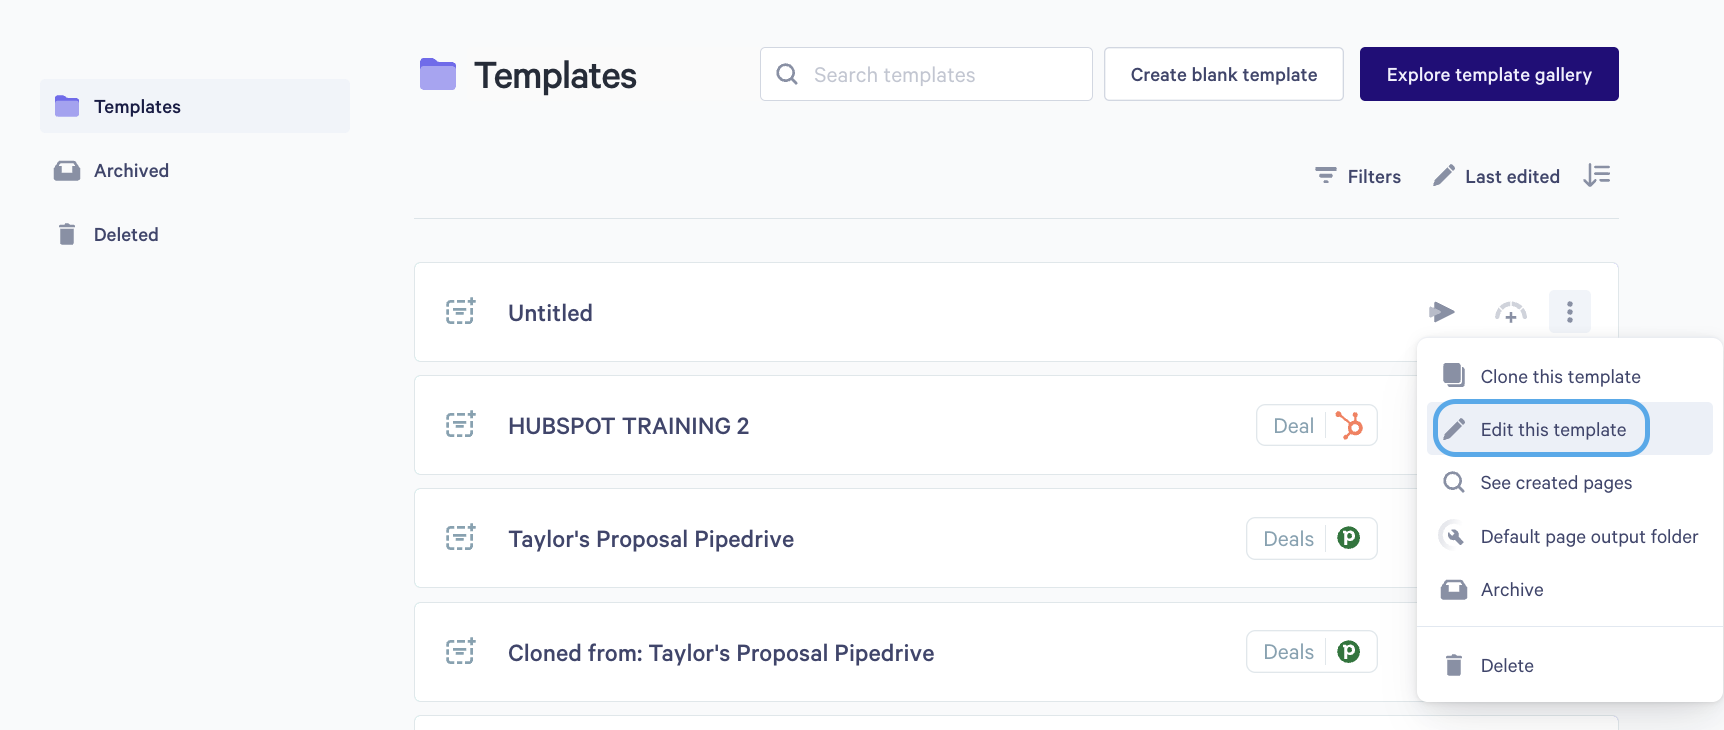
Your template now lives in your template dashboard. If you don't still have it open here's how to access it. Click the Templates on the left sidebar of your Qwilr dashboard.
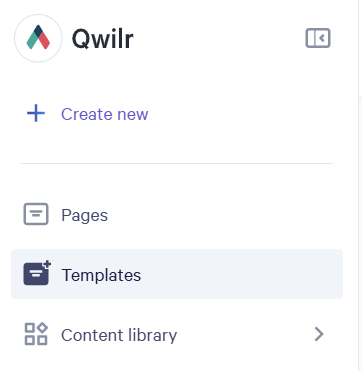
Locate your template in the dashboard, and then click more actions vertical dots option on the template you wish to edit, then edit this template option.
Next, head toward the top right corner of the template. Click on the Variables icon again to reveal your list of variables.

Note: The Account tab of this list is for Account variables, which are not currently supported for the Salesforce integration. Be sure to use the Salesforce tab.
There are four ways to place a variable.
Type two curly brackets. Put your cursor where you want the variable to go and type {{ . Your variable list appears right there.

Copy and paste. Click the Variables button in the top right to bring up your list and then click the copy icon next to a variable, then click to your cursor where you want it to appear and paste it into your Template with Ctrl+V or Cmd+V.

Drag and drop. You can click and drag the variable straight from the panel onto the Template.
Replace selected text. Highlight some text on the Template, click the 'V' icon in the context menu that appears, and then pick a variable to swap it out.

Variables from Related Records
An Opportunity Template can also reach fields on the related Account and the opportunity's Primary Contact, and a Contact Template can reach its Account. You can use the search box to find them.
Which Contact is the Primary Contact? It's the contact marked as primary in the opportunity's Contact Roles in Salesforce. If no contact role is marked primary, Contact variables come through empty.
For the full picture, including Owner fields and lookup drill-downs, see Salesforce V2: Managing Custom Fields.
Styling a variable
Click a placed variable and apply bold or italic like any other text. The styling holds when the real value drops in.
Variables in Page Titles
Without a variable, every Qwilr page you create from a Salesforce-connected Qwilr Template arrives with the same title. Putting one in the title gives each Page a name of its own.
Step 1. Click into the Template's title at the top of the editor.
Step 2. Type {{ . The variable browser opens right where your cursor is.
Step 3. Pick the variable you want. It appears in the title as a pill.
You can mix variables and ordinary text freely, and use more than one.

Still on the previous Salesforce integration? The title picker only appears on Templates linked to the new integration. Until you are on the new Integration, you can continue to follow this help doc to add variables to your title.
To upgrade to the new integration, follow the instructions from this doc Upgrade to Salesforce V2 Guide.
Visual variables
Variables aren't only for text. You can drive an image, a video, a Google Map or a button's destination from a Salesforce field, so the Page changes its visuals to match the record.
Below is a short example of adding a variable on an image but to learn more about how non-text variables work, you can review our specific support doc for non-text variables.
Step 1. Add the image, video, map or button to your Template as you normally would.
Step 2. Select it, and open the Select a variable option in its toolbar.

Step 3. Pick the Salesforce field that holds the value. For an image, video or map, that's a field containing a publicly reachable URL. For a button, it's the field holding the destination link.
Removing a variable
Changed your mind about a variable? Click it, then click the trash icon. The text around it stays as it is.

Repeating Variables
Some Salesforce data comes as a list rather than a single value, like the products on an Opportunity or its Contact Roles. Repeating variables let you place that list in a Table or Repeating content, and Qwilr adds a table row or a copy of the repeating content for each item when the Page is created.
You can use repeating variables with:
- Product line items on the Opportunity.
- Standard Salesforce lists, such as Opportunity Contact Roles.
- Custom lists your Salesforce admin has built on the record.
Note: Repeating variables are currently available for the Salesforce V2 integration only. Product variables can still be used in the Quote widgets as before.
Product line items in a Table
Step 1. In your Salesforce-connected Template, add a Table where you want the line items to appear. Set up your header row, for example Name and Quantity.
Step 2. Add a repeating row to the table. This is the row Qwilr copies once for each product.
Step 3. Choose the Products variable for the repeating row. You can select it from the row's variable picker, or search for "product" in the Variables panel and drag it onto the row.

Step 4. Add the product fields you want into the cells of the repeating row, such as the product name in one cell and quantity in the next.

Product line items in Repeating content
Use Repeating content when you want each product to appear as its own block of text, image or layout, rather than a table row.
Step 1. Add a Repeating content widget from the Advanced widgets

Step 2. Choose the Products variable for the widget. You can select it from the widget's variable picker, or search for "product" in the Variables panel and drag it onto the row.

Step 3. Write the content you want repeated and place product fields inside it.

When a Page is created, every product line item gets its own row in the table and its own copy of the repeating content. The list matches the line items in your Quote widget.
Note: Product line items in a Table or Repeating content are for display only. They aren't included in the Quote total. Pricing and totals are still calculated in your Quote block.
Salesforce lists (standard and custom)
Beyond products, you can repeat any list on your Salesforce record, such as the contacts in an Opportunity's Contact Roles or a custom list your team has created. A list needs to be enabled in your Salesforce variable settings before it appears in your Templates.
Step 1. Go to your Integration settings, select Salesforce, and open the Variables settings.

Step 2. Search for the list you want, for example "contact" to find Opportunity Contact Roles, or the name of your custom list. Lists are marked with an infinity symbol (∞) at the start of their name.

Step 3. Select the list to make it available in your Templates.
Step 4. Hover over the list and click View children. This is where you choose which fields from each item in the list you want to use.

Step 5. Select the fields you need. If the field you want sits on a related record, open that related record to drill down.

For Contact Roles, for example, open Contact and select First Name and Last Name.

Step 6. Return to your Template. The list now appears in the Variables panel. Add it to a Table repeating row or a Repeating content widget, then place its fields, the same way as for product line items above.

When you create a Page, Qwilr adds a table row or a copy of the repeating content for each item in the list. If the Opportunity has two Contact Roles, you'll see two rows, each with that contact's details.
Tip: Only select the list fields you actually plan to use. The list's own top-level fields are often IDs, so the fields readers care about usually sit one level down on the related record.
Custom lists your Salesforce admin has created on the record work too, and the steps are the same as for standard lists. In your Salesforce Variables settings, search for the custom list by name (it's marked with the ∞ symbol), select it, then use View children to choose its fields. Add the list to a Table repeating row or a Repeating content widget in your Template, and each record in the list gets its own table row or copy of the repeating content on the created Page.
Creating your Qwilr Page inside Salesforce
You can also start from Salesforce itself, using the Qwilr Proposals component on your record pages.
Step 1. Open the Account, Contact, Lead or Opportunity record in Salesforce and find the Qwilr Proposals component.
Step 2. Click Create new page. Qwilr opens with that record already selected, so there's no need to search for it again.

Step 3. Choose your Template. You'll only be offered Templates linked to that record type, then click Continue in the top right.

Step 4. You will then see a Page details window with your Page title, what Folder in your Qwilr account the page will be listed under, and your Variable data which communicates what information was pulled from what fields into the Qwilr page. If everything looks good, you can click Create page in the top right corner.

Step 5. A preview of the created page will come up. From here you can choose to set the page to Live and copy the Shareable link to send it to your customer, grab the collaborator link to send to a coworker for review, or Edit page to make further changes.

Step 6. Back in Salesforce, refresh your record page. Your new Page appears in the list.

What the Component Shows
Every Page built from the record gets its own tile:
- Page Status: for example Draft, Live, Pending or Accepted.
- Views: how many times it's been opened.
- Created: when the Page was made, and by whom.
- Collaborate and Edit page: open the Page in Qwilr.
- Shareable link: Open it, or Copy it straight to your clipboard.
- PDF version: download a PDF of the Page.
The three most recent Pages are shown; click View All for the rest.
The component is asking you to connect Qwilr? It shows an Authorize Qwilr button when it can't match you to a connected Qwilr account. Connect, then refresh the component.
Creating a Page From Inside Qwilr for a Salesforce Record
Step 1. Open Qwilr and click on Create New and then Use a Template. Select a Salesforce connected Template.
Step 2. This will open a menu to paste in the URL from the Salesforce record you want to create the Page from. In this case we have an Opportunity template so we need the URL for an Opportunity record. Once that has been pasted in, click Continue in the top right.

Step 3. The Page Details appear, letting you confirm that you have the correct Page title, which Folder you want the Qwilr page to be located in within Qwilr, as well as the Variable data so you can review the fields that were imported from the record. If everything looks good, click Create page in the top right.

Step 4. Now you have the opportunity to review your page. You will see a preview window of the page and alongside it, on the left, you have the option to set the page live and click the Copy shareable link button to send the page to your customer, send the page instead to a colleague for review via the Copy collaborator link button, or if further edits are needed you can click edit page.

If you head back to your Salesforce Opportunity record (or whichever record you used to create this page) and refresh it, you should see the page details in your Qwilr panel.
What the Component Shows
Every Page built from the record gets its own tile:
- Page Status: for example Draft, Live, Pending or Accepted.
- Views: how many times it's been opened.
- Created: when the Page was made, and by whom.
- Collaborate and Edit page: open the Page in Qwilr.
- Shareable link: Open it, or Copy it straight to your clipboard.
- PDF version: download a PDF of the Page.
The three most recent Pages are shown; click View All for the rest.
Any questions? Don't hesitate to contact us at help@qwilr.com