
Adding security to a Qwilr Page
Flexible Options for Enhanced Page Protection!
Depending on the type of content within your Qwilr Page, enhancing the security of your Pages is crucial to ensure your content is accessed only by the people you authorize. Qwilr offers a variety of flexible security options to meet your needs.
Note: Some features are only available to Growth and Scale customers (or on legacy Enterprise Plans). Learn more on our pricing page.
In this article
- Accessing the security settings
- Adding security to a Qwilr Page
- What your Buyer sees
-
Restricting authentication to a specific email domain
Accessing the Security Settings
To access the security settings for a page, you can either click the Share button while you're editing the page, or hover over the page on your dashboard to reveal the Share button there.
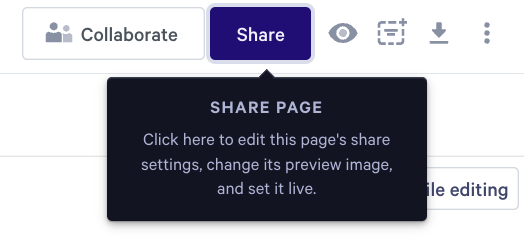
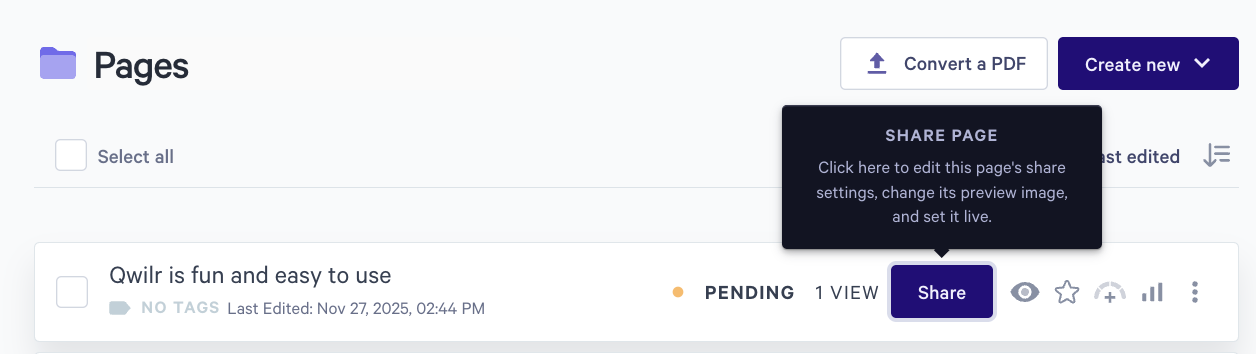
Adding security to a Qwilr Page
You'll then see a pop-up where you can access your sharing and security settings. We'll take a look at an Growth and Scale Plans-only option first, and then you can check out the links below that, to learn more about all the options.
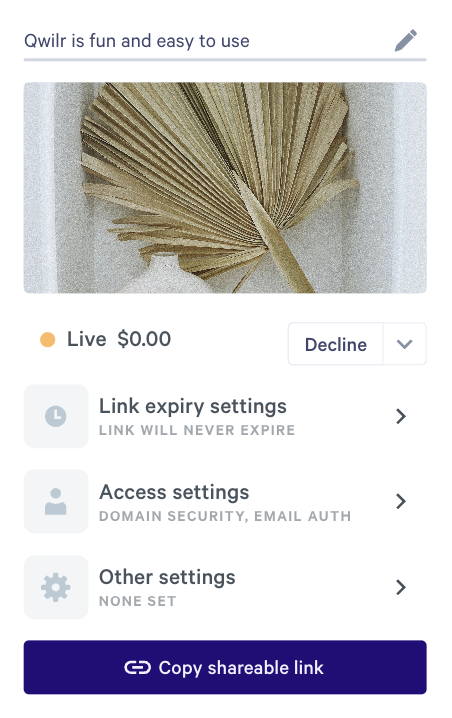
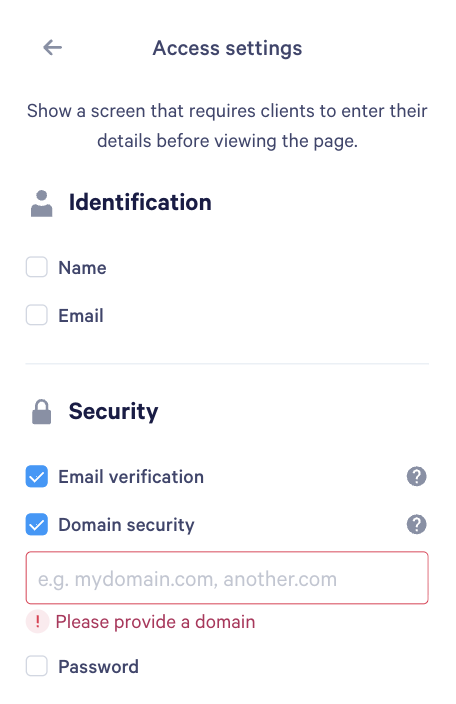
Identification Verification Settings
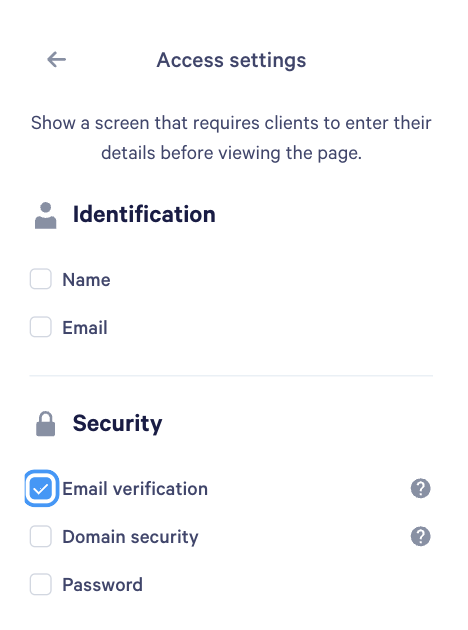
Following the above steps, click Access Settings, then click the Email Verification checkbox. This will also allow Domain Security to be selected if you want to limit the access from the domain an email user comes from.
Note: This is only available for Growth and Scale plans (and legacy Enterprise plans).
Alternative Step
If you want to simply have them fill out their name or email address for tracking purposes in analytics, without needing them to login to their email to verify, you can check either of the two Identification options of Name and/or Email.
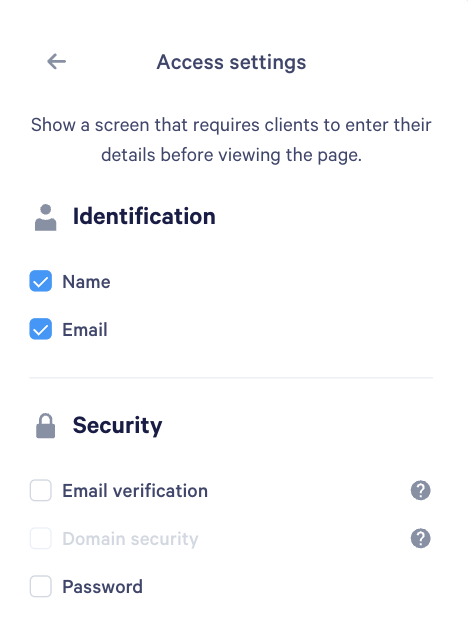
Note: For Growth and Scale plans you can also apply this setting to any template, so identity verification is automatically applied to each page your team creates from it.
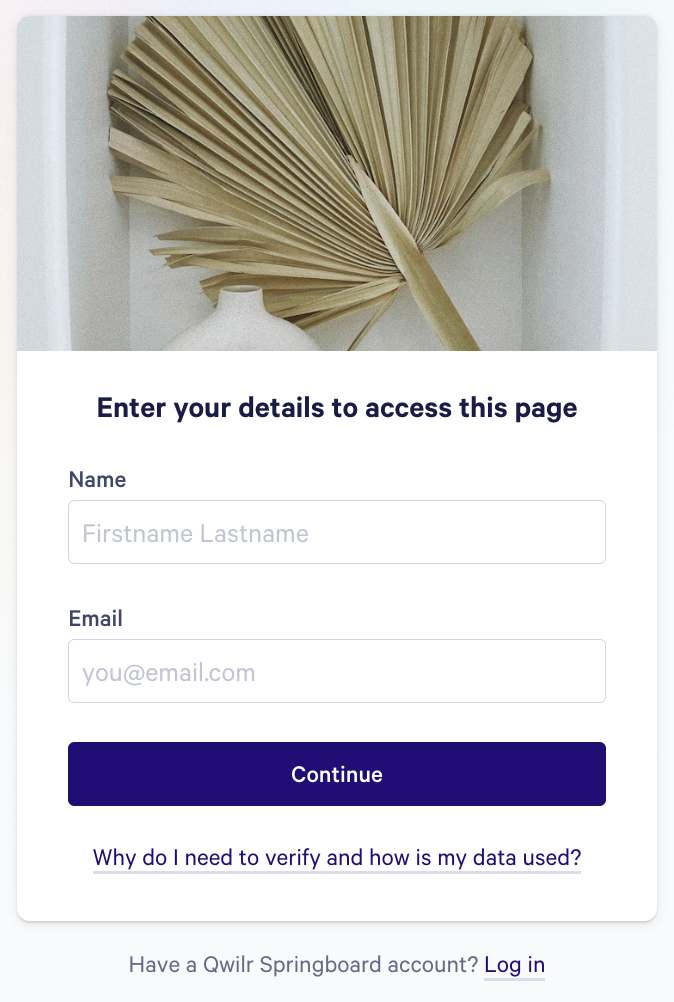
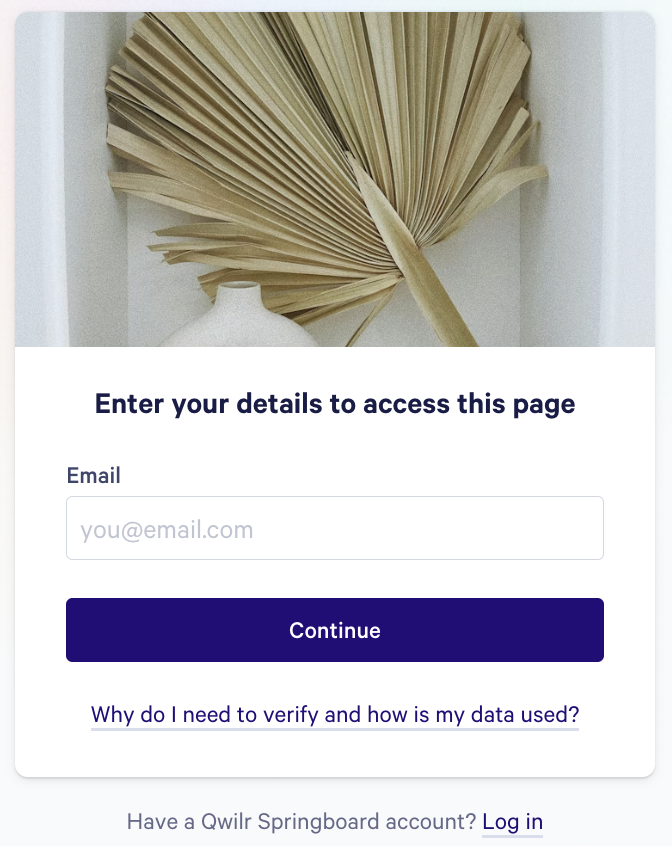
What your Buyer sees
Once you've enabled identity verification, your buyers will see this form when they visit your Page.
-
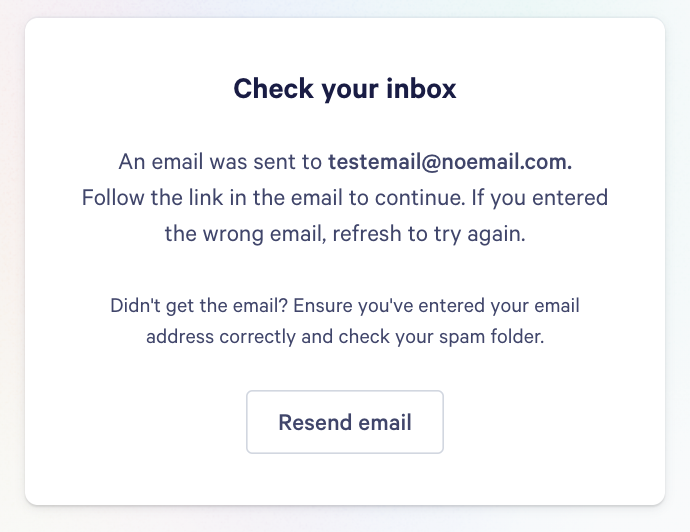
If your buyer chooses to authenticate with email, they'll enter their name and email address. Then they'll receive an email with a link to verify their email address. Once they've verified, they'll be able to view the Page.
Note: If your client has a Qwilr Springboard account, they can choose to log in with their existing Springboard Account to populate their name and email.
Restricting authentication to a specific email domain
For even more security, you can restrict verification to viewers with a certain email domain, or a set of domains.
To do this, head back to the security settings and set the page up for email verification as shown above. Then check the box for Domain Security, and enter the approved domain(s).
If you want to allow views from more than one domain, separate them with commas. You don't need to type the @ symbol.
Once someone has verified their identity and viewed your page, you'll be able to see this information within your page analytics.

Other Security Options
Not a Growth/Scale Customer? There are plenty of options you can use instead! Check them out below.
Got questions about Security? Reach out to help@qwilr.com to get the answers you need!