
Hubspot V2: Setup and Create
Ready to build proposals that fill themselves in? Qwilr's HubSpot integration pulls data straight from your Contact, Company, and Deal records, so every Page starts personalized.
This guide covers connecting the integration, building your first HubSpot Template, and creating Pages from your HubSpot records.
Before You Start
- You'll need Admin access in both Qwilr and HubSpot.
- Each team member who creates Pages needs their own Qwilr user seat.
In this article:
- Connecting the Integration
- Creating your template
- Adding Variables
- Custom fields and Variables in the title
- Styling a Variable
- Removing a Variable
- Visual Variable types
- Creating custom fields for visuals
- Adding an image placeholder to the Qwilr template
- For video, maps, and buttons
- Changing the object for a template
- Deleting a HubSpot template
- Cloning a HubSpot template*
- Creating a page from inside Qwilr for a HubSpot Record
- Creating a Qwilr page from inside a HubSpot Record
- The page card from inside HubSpot
* Links to a separate article
Note: Already using our previous HubSpot integration? Your existing Templates keep working.
See HubSpot: Upgrading to HubSpot V2 Guide for how to move a Template across without rebuilding it.
Connecting the Integration
Step 1. Go to Integrations on the left sidebar of your Qwilr dashboard. Then, find the HubSpot New version card.


Step 2. Click Enable HubSpot. A HubSpot pop-up opens and asks you to choose the account to connect and approve the permissions Qwilr needs.

An approval modal should appear to select your HubSpot account and confirm.

Step 3. Once you've approved, you'll land back in Qwilr with the integration enabled and the top-right button changing to disable.
Note: If you get an error: Couldn't complete the connection, please head over to this link for instructions to how to update the application permissions on HubSpot.
Creating a Template
Step 1. To create a new blank template, click Templates on the left sidebar of your Qwilr dashboard and then click the create blank template button.
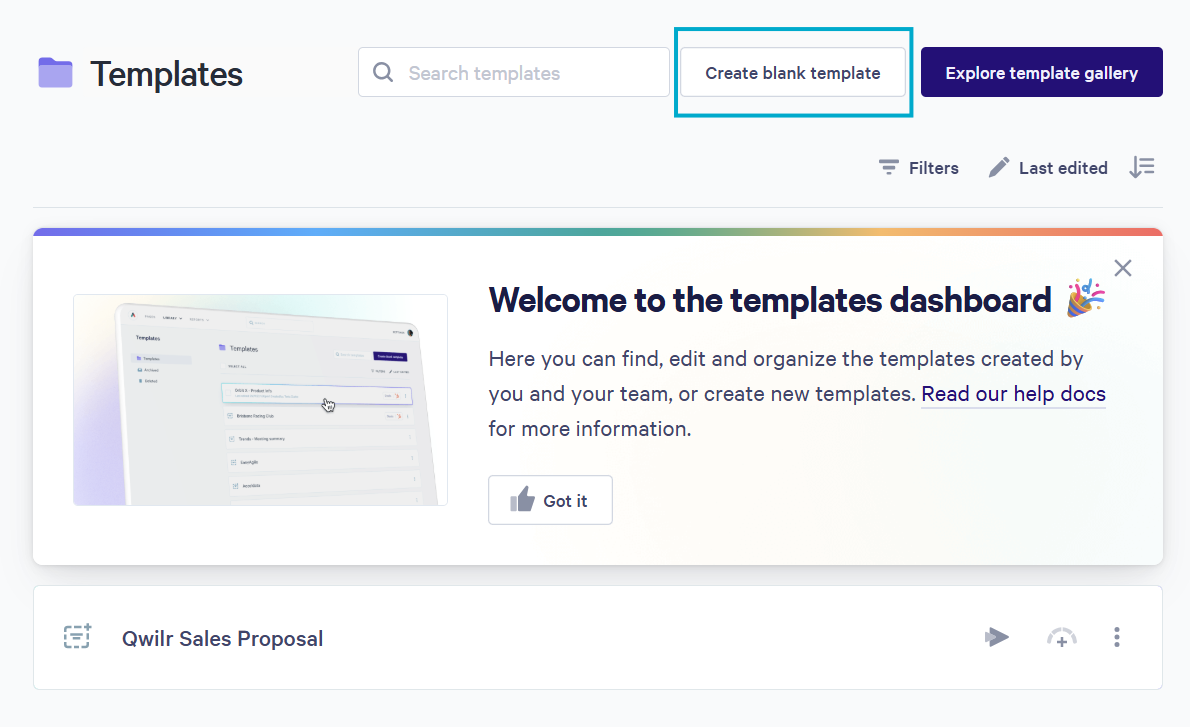
Maybe you already have a Qwilr page you've created that you want to see as a template. After you create a Qwilr Page, while editing it, you can head to the top right corner and click the Convert to Template icon.

Step 2. With the conversion or blank template creation done, it's time to connect this template to HubSpot. A new Variable icon will pop up in the top right corner of the template. Click that.

Step 3. A list of available Variables will appear. It has two tabs. Click on the CRM tab, and then click Link CRM to template.

Step 4. Enable the Use in HubSpot switch, and then choose which type of HubSpot records you plan to use it in: Company, Contact, or Deal. Click Continue to save.

Note: The object you choose determines which Variables will be available to add to your template. You can also change the object at any time.
Adding HubSpot Variables
Now that you've converted the template, it's time to add some Variables.
Your template now lives in your template dashboard. If you don't still have it open, here's how to access it. Click the Templates option on the left sidebar of your Qwilr dashboard.
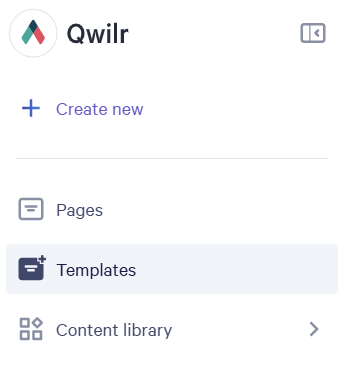
Locate your template in the dashboard, and then click the more actions vertical dots option on the template you wish to edit, then select the edit this template option.

Next, head to the top right corner of the template. Click on the Variables icon again to reveal your list of Variables.
Note: The Account tab of this list is for account Variables, which are not currently supported for the HubSpot integration. Be sure to use the HubSpot tab.
If you have custom or new fields added in your CRM records, you can now refresh your Variables list here to sync them over to Qwilr!
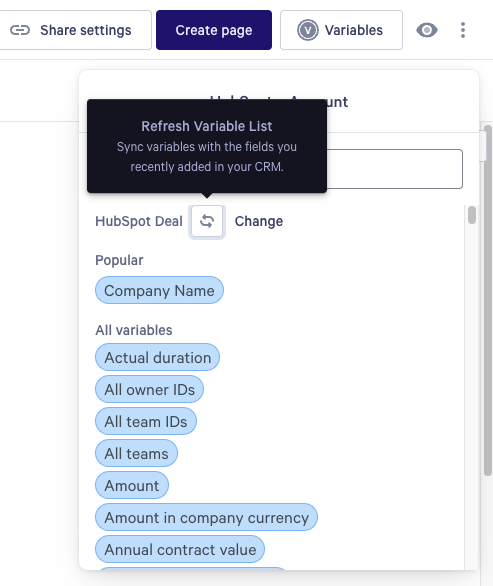
Four ways to place Variables
You can either copy/paste or drag/drop Variables into your template.
To copy a Variable, click on the Copy icon next to its name. Then place your cursor in the template where you want the Variable to be. Use your keyboard command of Ctrl-V or Cmd-V to paste it.

Alternatively, you can click on the Variable and drag it to the location in your template.

You can also replace highlighted text with a variable by utilizing the context menu and selecting the variable icon.

Or you can type two curly brackets {{ and the quick selection menu will appear.

Variables for custom fields
You can add custom fields to your HubSpot records. If you do, those Variables will appear in the Qwilr Variable list automatically. It can take up to 15 minutes for that process to complete.
Using Contact and Company Variables in a Deal template
If you're using Deal records in HubSpot, you can associate Contact and Company records with any Deal. That will allow you to use Contact and Company Variables in your Qwilr template as well.
Once you've associated the records, you should see the new Variable options appear in your Qwilr list within a few minutes.
Variables in Page Titles
Without a Variable, every Page you create from a Template arrives with the same title. Putting one in the title gives each Page a name of its own — Proposal for Acme Inc, rather than twenty copies of Proposal.
Step 1. Click on the Template's title at the top of the editor.
Step 2. Type {{ . The Variable browser opens right where your cursor is.
Step 3. Pick the Variable you want. It appears in the title as a pill.
You can mix Variables and ordinary text freely and use more than one. Every Page you create from the Template then takes its title from that record.

Upgraded from the previous integration? The title picker only appears on Templates linked to the new integration. On an older Template, typing {variable.name} will still work.
Styling a Variable
You can make any Variable bold or italic. Click on the Variable, then choose the style you want.

Removing a Variable
To remove a Variable, click on it, then choose the trash can icon.

What kinds of visuals can you work with?
Qwilr supports these kinds of visual Variables:
- Images (you'll need to have them hosted online)
- Videos (hosted on one of our supported services)
- Google Maps (you'll need the embed code for your map)
- You can also attach a Variable to Qwilr's clickable button, so it can link to different destinations in different pages.
You can use any or all of these in a Qwilr template, alongside your regular HubSpot Variables.
Note: Wherever you host your visuals, they need to be set as publicly available. Private content won't work with Variables. Images hosted on Google Drive are not currently supported.
Creating custom fields for visuals
In your HubSpot account, you'll need to set up one or more custom fields for each type of visual you'd like to use. These fields should be "multi-line text" fields.
Each new custom field will generate a new Variable in your Qwilr Variable list.
As you work with client records in HubSpot, you'll paste the URLs for your hosted visuals into the custom fields. Here's an example from a HubSpot record.

Adding an image placeholder to the Qwilr template
Next, you'll need to set up the spaces in your Qwilr template where these visuals will go. You'll add placeholders, and then attach the new Variable to them.
As an example, let's say that you want to include a product image in each Qwilr Page. You have a total of 5 images, which are all hosted online. You have a unique URL for each one. You need to have different clients see different images in their Qwilr Pages. So we'll add an image placeholder to our template.
Step 1. Open your template for editing. To add an image placeholder, click on the + symbol that appears on any blank line. Then choose Image from the menu.

This adds a new image placeholder to the template. You can drag its corners to resize it as needed.
Step 2. Click on the top edge of the placeholder to bring up its toolbar. Click the Add Variable icon.

That will bring up a list of your HubSpot Variables. Locate the custom field's Variable and click on it.
That's it! Your image placeholder is all set. When you create a new page from this template, it will pull in the image URL from your HubSpot record and display it in the page.
For video, maps, and buttons
The process is the same for the other kinds of content: add the placeholder to your template, and then attach a Variable to it.
All of the placeholders begin by clicking on the + symbol on any blank line and then choosing the type of content you need from the menu.
HubSpot Variable format
The best way to find the correct formatting is in your HubSpot account. Click the Actions button in the Qwilr widget and choose Show Variables. You'll see a list of available Variables in the correct format.

Copy the text from the list, and paste it between your curly brackets.
Changing the object for a template
Sometimes you convert a template for one object, but then realize you want to use it with a different object.
For example, let's say you've created a Deal template for HubSpot, and you later want it to be a Company template instead. No problem - you can change the object associated with your template at any time.
To get started, open your template for editing. Then head to the top-right corner and click the Variables icon. The Variable list will appear, and at the top you'll see the object this template is currently assigned to. Click Change.

You'll be prompted to choose a different object. If you have Variables in your template that won't be supported with the new object, you'll be prompted to change these as well.
Click Confirm to save the changes.
Deleting a HubSpot Template
You can delete your HubSpot Template by going to your Template Library and finding the template you want to remove. Click More actions (the three dots) next to the template, then select Delete.

Note: Only account admins can delete templates.
After you delete the template, Qwilr will hold it in the Deleted folder of your dashboard for 30 days, and you can still access and restore it during that time.

After 30 days, it will be deleted permanently and not recoverable.
Creating a Page From Inside Qwilr for a HubSpot Record
Step 1. Click either + Create or the Create new button on your Qwilr Dashboard and select your HubSpot connected Template.

Step 2. Paste in the URL of the HubSpot record (of the same object type, like a Deal record for a Deal template) that you want to create the page from.

Step 3. If you're building from a Deal, choose which associated Contact to use. That choice decides whose details fill any Contact Variables on the Page.

Step 4. Click Continue. Qwilr fills your Variables with that record's values. A field that's empty in HubSpot will come through empty.
Step 5. Review the Page, then edit or share it.

Creating a Page From HubSpot
You can also start from HubSpot itself. The Qwilr card sits in the right-hand sidebar of any Contact, Company, or Deal record and lists every Qwilr Page already built from that record.
Can't see the card? You may need to add it to your record view. In HubSpot, open any record and click Customize at the top of the middle column, choose Default view, open the Card library panel, filter for Qwilr, add the card, and save your view.
Step 1. Open the Contact, Company, or Deal record in HubSpot and find the Qwilr card in the right sidebar.
Step 2. Click Create new page. Qwilr opens with that record already selected, so there's no need to search for it again.
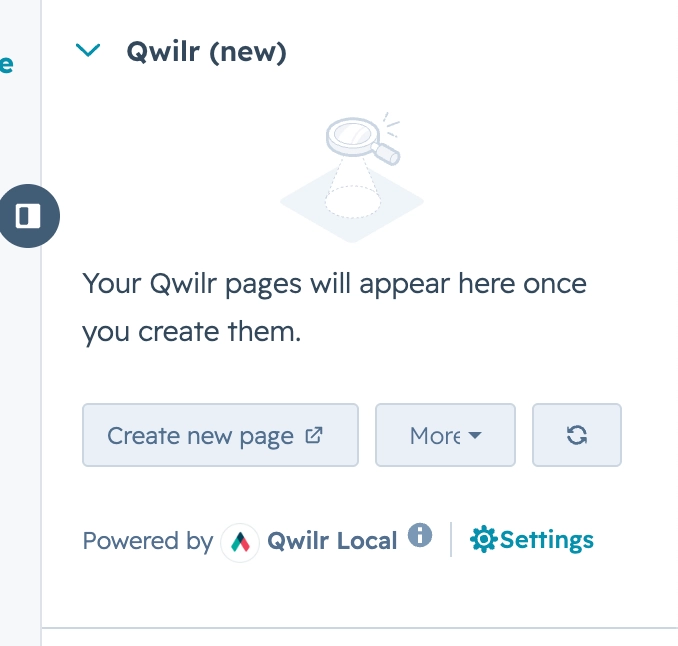
Step 3. Choose your Template. You'll only be offered Templates linked to that record type.

Step 4. Similar to the above, you'll be able to review the page created and then choose to share it directly or make further edits.

Step 5. Back in HubSpot, click the refresh icon on the card. Your new Page appears in the list.

What the Card Shows
Every Page built from the record gets its own tile:
- Page Status. Examples might be Draft, Live, or Pending.
- Views. How many times it's been opened.
- Collaborate and Edit page. Either open a preview link of the page or the page in Qwilr editor.
- Shareable link. You could open the public page or copy it straight to your clipboard.
Click View more on a tile for the PDF version to download, plus who created the Page and when.

Any questions? Don't hesitate to contact us at help@qwilr.com